By: Veena Johnson
Are you someone who enjoys getting creative with the things around you? Are you a busy student looking for ways to make your life a little easier without spending a lot of time or money? Look no further! In this blog, we’ll explore five quick craft ideas you can make with simple materials found at home or in your dorm. These DIY projects not only help you stay organized but also promote sustainability by reusing materials that would otherwise be discarded. So, whether you’re a seasoned crafter or just starting out, these ideas are sure to inspire you to make something useful and fun.
Are Your Cords in a Mess? Create a Handy Cord Organizer!
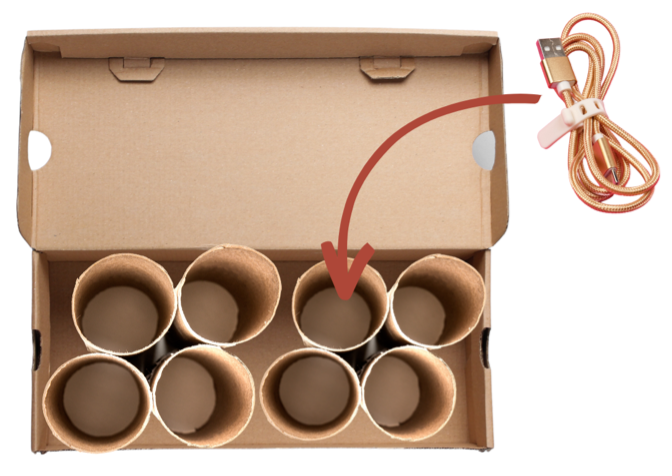
One quick craft idea that could make your life easier and more organized is to create a DIY cord organizer. This craft will help keep your cords organized and prevent them from getting tangled, making it easier for you to find the one you need and avoiding the frustration of dealing with a tangled mess.
To create this craft, you will need:
- Empty shoe box.
- Empty toilet paper rolls.
- Scissors.
- Ruler or measuring tape.
- Pen or marker.
- Glue gun or strong adhesive.
Here’s how to do it:
- Measure the length and width of the inside of your shoe box.
- Mark evenly spaced sections for the empty toilet paper rolls.
- Glue or use adhesive to secure one end of each toilet paper roll to the spaces.
- Allow the adhesive to dry and place your cords into the spaces and arrange them neatly.
- Your cord organizer is ready to use!
Do You Forget Important Meetings? Create a DIY Dry Erase Memo Board!
Another quick craft idea that could make your life easier is to create a DIY memo board. Use this to write down your to-do list, grocery list, or any other important notes you need to remember. You can also use different colored markers to help categorize your notes. This will help keep you organized and on track, while also adding a fun and personalized touch to your home or office space.
To create this craft, you will need:
- Picture frame (preferably with a glass or plexiglass front).
- Scissors.
- Glue gun or strong adhesive.
- Paint or wrapping paper.
Here’s how to do it:
- Remove the backboard and glass or plexiglass front from a picture frame.
- Paint or cover the frame with wrapping paper.
- Reassemble the frame with the backboard and plexiglass.
- Use dry-erase markers for reminders.
- Enjoy your functional and stylish memo board.

Never Lose Your Keys Again with this DIY Key Holder
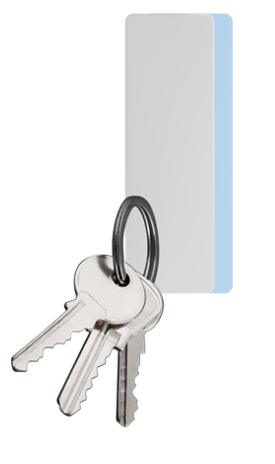
One DIY hack that could make your life easier is to create a simple “key holder” using a magnet. This can be particularly useful if you often find yourself misplacing your keys.
To create this craft, you will need:
- A strong magnet.
- Adhesive (such as removable mounting squares).
Here’s how to do it:
- Clean and dry the back of the magnet.
- Apply the adhesive to the back of the magnet.
- Press the magnet onto the wall at a convenient location such as near your front door.
- Put your keys up to the magnet.
- Now you’ll always know where your keys are and save time searching for them!
Need a Bag? Create Reusable Tote Bags out of old T-Shirts!
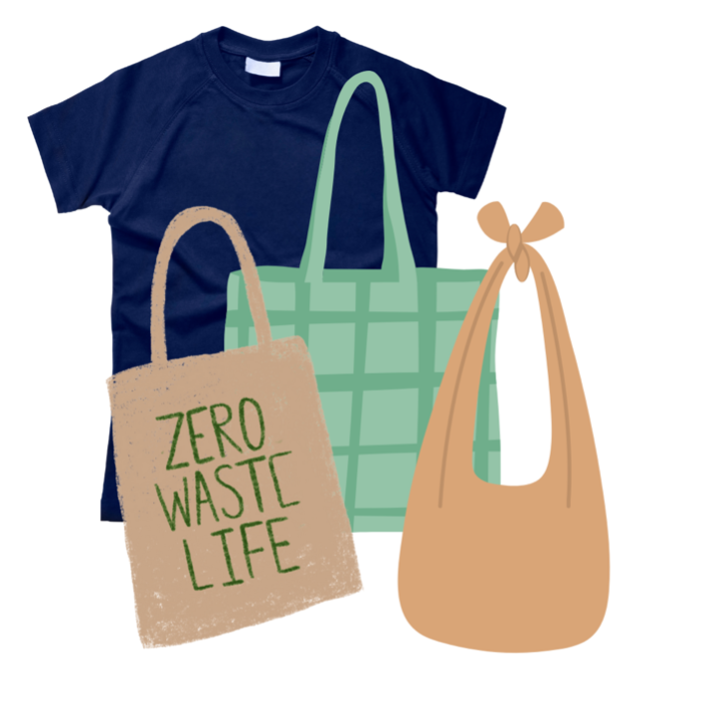
One DIY hack that can make your life easier is to create a reusable tote bag from an old t-shirt. This will help you reduce waste by using an old t-shirt instead of a disposable plastic bag, and it’s a quick and easy way to make a custom grocery bag that you can use again and again. Use cool designs to make neat looking tote bags!
To create this craft, you will need:
- Old t-shirt.
- Pair of scissors.
- Marker or pen.
Here’s how to do it:
- Lay the t-shirt on a flat surface, such as a table or the floor.
- Use a marker or pen to mark where you want to cut the sleeves off.
- Use scissors to cut along the lines you marked.
- Cut the neckline of the t-shirt so that it forms a large opening.
- Cut off the bottom of the t-shirt, leaving about 1-2 inches of fabric at the bottom.
- Cut 1-inch-wide strips along the bottom of the t-shirt, leaving the 1-2 inches of fabric uncut.
- Tie the strips of fabric together in a knot, making sure to tie the front and back strips together.
- Turn the bag inside out, so that the knots are on the inside.
- Your reusable bag is now complete and ready to use!
Keep all Your Devices in One Place with a DIY Charging Station!
Here’s another quick craft idea that can make your life easier: a DIY charging station! This will help you keep all your devices in one place while they charge and prevent cords from getting tangled or lost. Plus, it will give you a designated spot to charge your devices, freeing up counter space and reducing clutter in your home.
To create this craft, you will need:
- Shoebox or plastic box (with a lid or open top).
- Power strip.
- Scissors.
- Paint or decorative paper (optional).
Here’s how to do it:
- Choose a shoebox or plastic box that fits the power strip.
- Cut small vertical holes for the charging ports.
- Connect the chargers to the power strip inside the box.
- Paint or cover the box with decorative paper.
- Thread the ends of the chargers through the vertical holes.
- Plug in your devices!
- Enjoy your custom charging station.

References:
https://dollarstorecrafts.com/2012/07/make-a-device-charging-station/,
http://www.creatinglaura.com/2014/05/sewing-tote-bag-out-of-t-shirt.html?m=1
https://www.apartmenttherapy.com/little-life-savers-clever-ikea-hacks-for-small-spaces-227069
January 22, 2024 at 11:12 pm
Nice Information about Make Your Life Easier
September 12, 2023 at 2:28 am
This is the Informative Blog shared by You and definitely it will useful for all