

Quick Start
This document will assist you in logging in to Blogs@UWW for the first time, and making your first blog post. If you haven’t already, request for your blog.
Your blog’s address
Your blog address is http://blogs.uww.edu/blogname. The value of ‘blogname’ is what was entered when your blog was requested.
Logging into your blog for the first time
After your blog has been set up, you can access it for editing by going to the Blogs@UWW Website (https://blogs.uww.edu). To login, use your UW-Whitewater Net-ID and password. (What is my Net-ID?).
Navigating: an overview of tabs
Once you login, you will see your blog’s Dashboard. WordPress uses a sidebar paradigm for navigation. To navigate, use the Side Bar. Options available to you include:
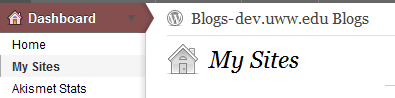
- Dashboard – If you have multiple blogs setup, you can switch between them using My Sites, or Dashboard takes you back to the main page of your current blog.
- Posts – Create or manage posts, categories, and tags.
- Media – Upload and manage media files.
- Links – Create or manage links and link categories.
- Pages – Create or manage pages.
- Comments – View and manage, as well as approve or unapprove, the comments on your blog.
- Appearance – Allows you to change the look and feel (“theme“) of your blog. If your theme supports it, you can also customize components (“widgets”) and the placement of elements of your blog.
- Plugins – Enable, customize and disable extensions which have been installed by Blogs@UWW support.
- Users – Add or remove UW-W users from your blog. Also, manage your user personal information, which may or may not be shown on your blog.
- Tools – Download and install tools to improve your blogging experience. Also import or export content to and from your blog.
- Settings – The central location to change configuration settings for your blog, and many of the plugins which you may be using.
More information on plugins and settings are available in the Advanced Features page.
Making a post to your blog (Creating an entry)
To post to your blog, follow these steps:
- If you can post to more than one blog make sure you are in the correct blog by verifying that the title at the upper left of the screen is the title of the desired blog. If it isn’t, you can click “My Sites” under the dashboard to pull up a list of blogs you own.

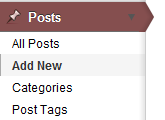
Click the name of the blog you wish to edit. - Click the Posts option on the sidebar
- Click Add New on the sidebar. It will be under the “Posts” category you have just opened.
- Add a title. In the empty field at the top (directly below the Add New Post header), enter a subject, title or name for your post.
- Add your content. Enter your post into the large box with editing tools in the middle of the page.
- Add your post to a category. To the right of the screen, there will be a box titled “Categories”. Simply check the box next to categories associated with your post. You can add categories on-the-fly from here as well.
- Add tags (keywords) to your post. Enter your tags in the Tags field, separated by commas. This box is located under the Categories box.
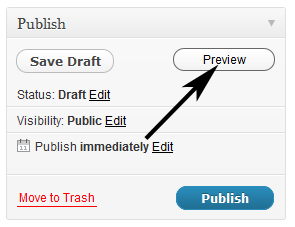
- Click the Publish button. Your post will appear on your blog. If you’d like to save your post and still continue to edit your content, click the Save Draft button. When you are ready to post, click the Publish button and your message will be posted.
To view your page, click the ‘Preview‘ button in the Publish box.
Making posts quickly (using “Press This“)
Press This allows you to perform one-click posting and publishing without going through the main WordPress interface. Press This creates a Favorite or Bookmark in your browser that goes to the Press This window with fields so you can enter a title and the body of your post.
To set-up ‘Press This’ do the following:
- Login to Blogs@UWW and click Tools.
- On the page that pops up, look under the Press This section and right click on the “Press This” link. Choose “Bookmark This Link…” or “Add to Favorites…”
Posting Photos and Other Media
Follow these instructions to add pictures to your post:
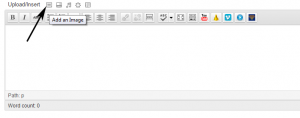
- In the Post field, you’ll see the Images button.
- You must now decide where you want to obtain the image from. If the file is on your computer, select the “From Computer” on the top of the window that pops up. You may also obtain images using the “From URL” or “Media Library” options.
- Click the Select Files button. The ‘File Upload‘ window will appear. Choose the image you wish to upload from your computer. Click the Open button.
- Your picture will appear, click ‘Insert into Post’.
- Your picture will appear in your post, in the ‘Post‘ field. Click on and drag the lower right corner of your picture to resize your image.

Follow these instructions to add other media into your post:
- When writing your post, notice the ‘Add Media‘ options directly above the post editing area. There are four options available:
 Images
 Video
Video Audio
Audio Media
Media
Click your desired media.
- A new window will pop up asking you to locate the media. There are three possible ways to retrieve your media:
- From Computer – If you have not uploaded the media yet, you will be presented with an option to select files from your computer.
- From URL – If the media is located on the internet, select this tab at the top of the new window and specify the URL of the media you wish to use.
- From Media Library – If you have previously uploaded the desired media, it will be available through the ‘Media Library’ tab.
- Once you have specified the location of your media, you will be presented with an additional list of options.
- Title (required)
- Caption – A caption that appears when the media is used
- Description – A description of the media
- Link Url – Specifies what happens when clicking on the media in a post. It can link to a profile of the media or to the actual media.
- Alignment – Edits where the media will be displayed on the post
- Size – How large the media appears in the post
Once you have set all these options to their desired values, click ‘Insert Into Post‘. Alternatively, you can delete the media if you have changed your mind.
Editing a post
On the side bar, click ‘Posts‘. You will be presented with a list of your posts. Hover over the Title of the post to see a list of options available. In this case, you would click either “Edit” or “Quick Edit”.
Deleting a post
In the side bar, click ‘Posts‘. You will be presented with a list of your posts. Hover over the ‘Title‘ of the post to see a list of options available. In this case, you would click the “Trash” option to delete it.
About comments
Unless set up otherwise, Comments made to your blog are only viewable after the blog owner approves them. When someone makes a comment on your blog, the blog owner will receive an email asking to approve the post. Click the ‘Approve‘ link in the email or login to Blogs@UWW and click ‘Comments‘ from the side bar to see comments waiting for approval.
Once you approve a comment from a user, he or she should be able to comment freely thereafter. If you go to the Comments tab you can view the comments on your blog as well as those awaiting moderation.
Archives
Archives of your blog are kept by month. On your blog page, you can go to the archives for a month by clicking on the month name under Archives on the right side of the blog page.
Using themes to change the look of your blog
You can use styles supplied with Blogs@UWW to change the look and feel of your blog.
- On the side bar, click on ‘Appearance‘
- At the top it shows you your current theme. Available themes will be displayed below your current design preview. To change your blog to one of these themes click on the image or the title.
A preview of your blog with the new theme will pop up. If you are satisfied with this theme, click the ‘Activate‘ link to the upper right. Your theme will now be changed.