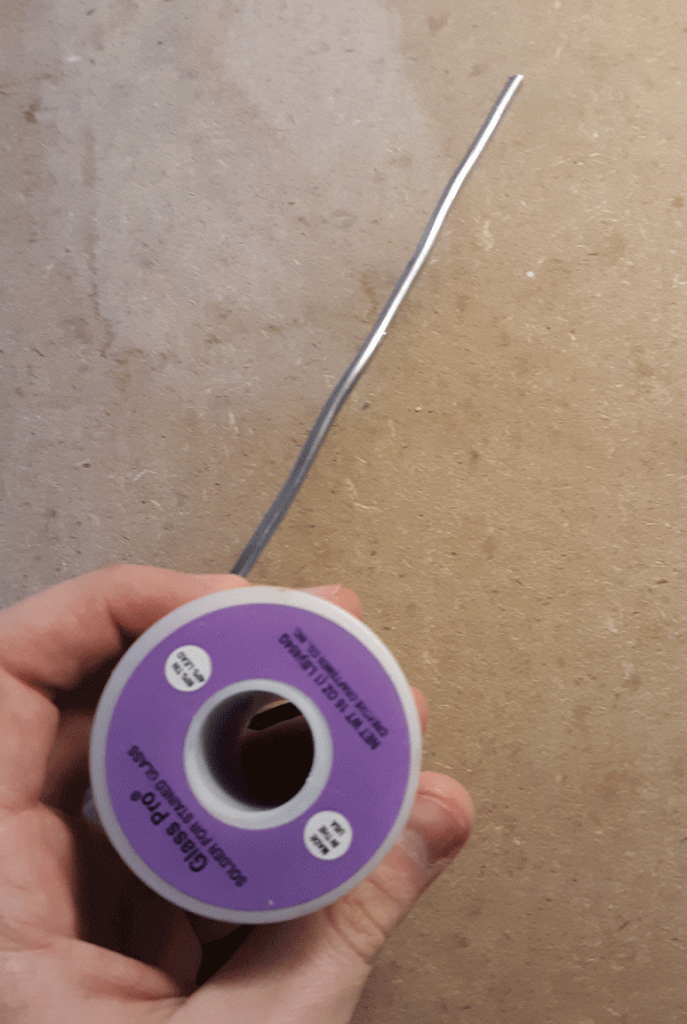
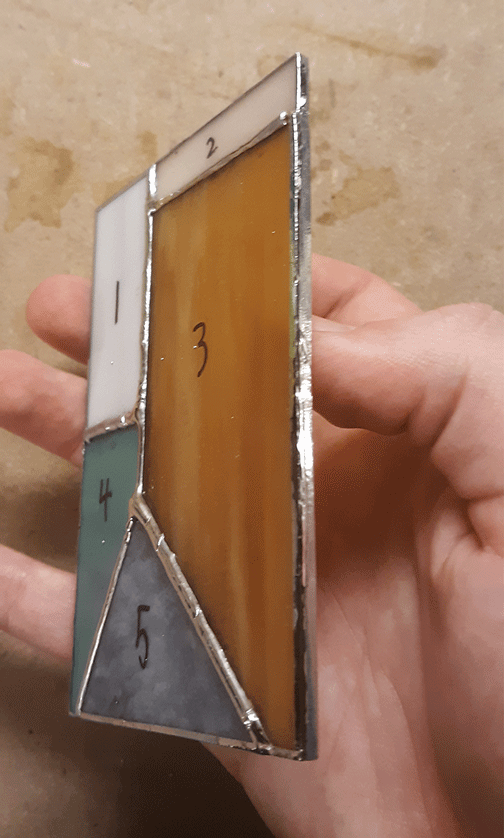
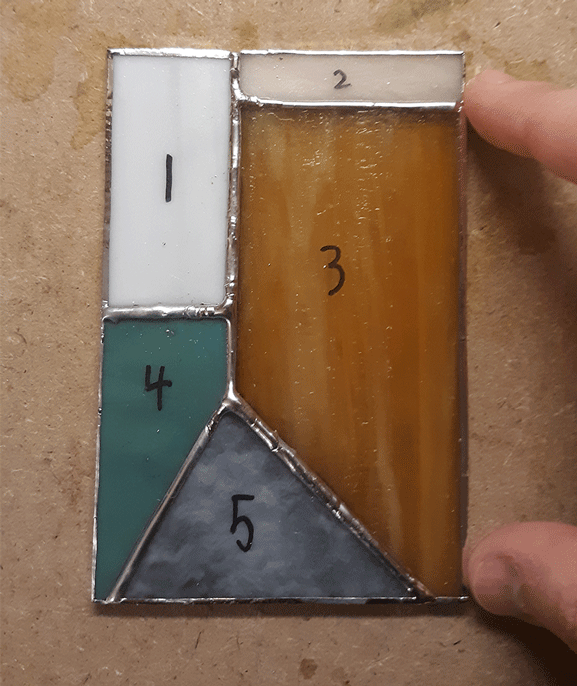
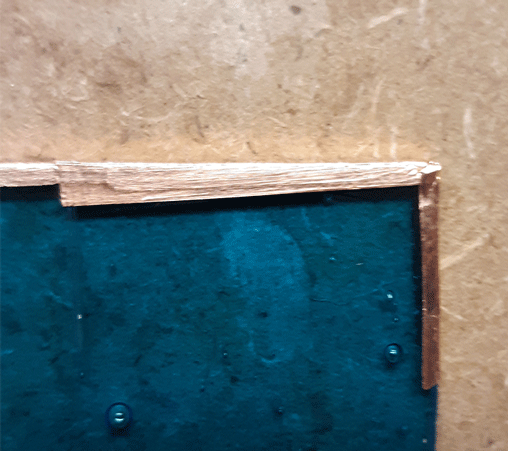
Adding Lead Came to your Project
By using lead came on your project your reinforcing the outside edges of your piece. This week’s post will be shorter than usual, but in it I’ll be showing you how to stretch out your came and how to attach it to your project.
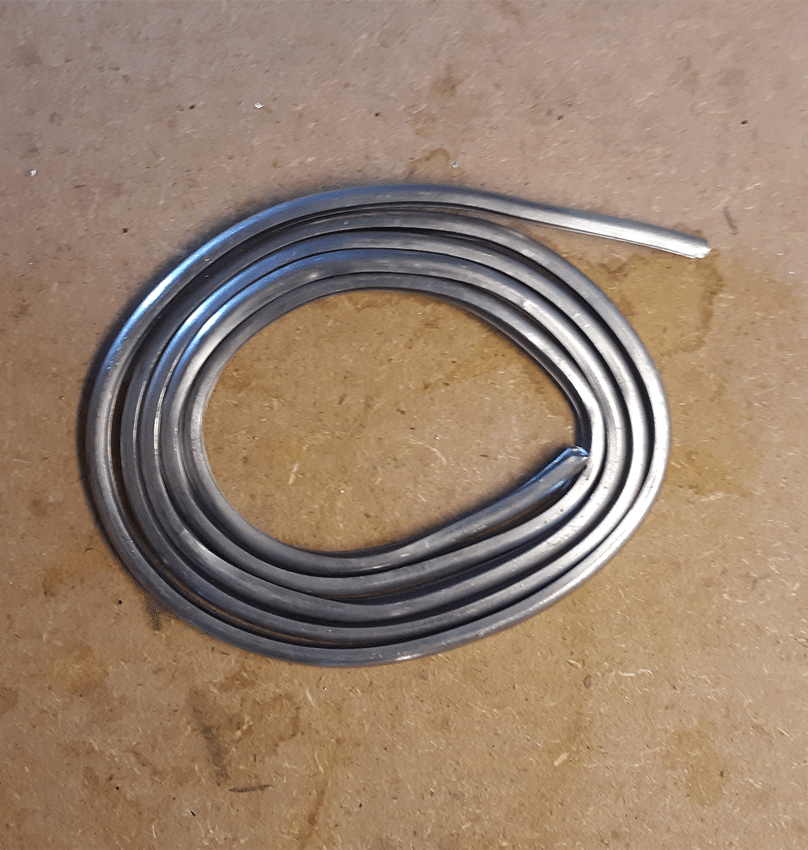
Stretching your Came
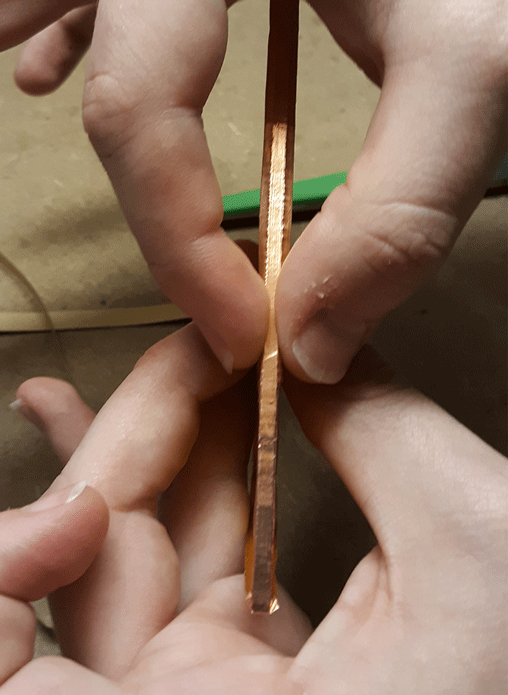
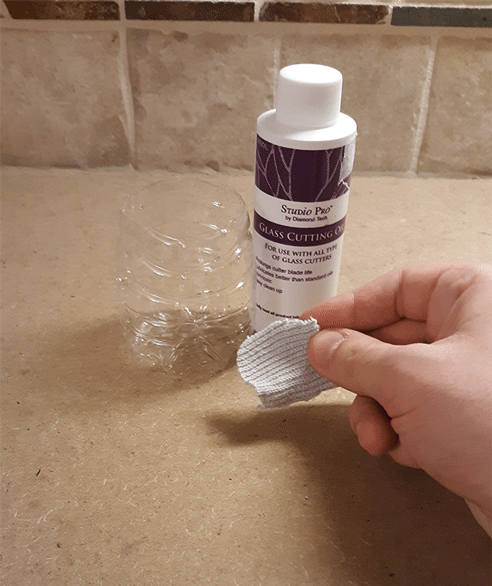
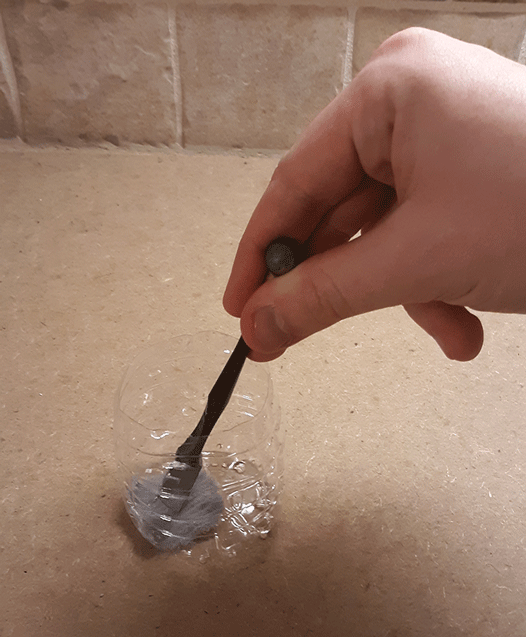
In its original form, lead came is very supple and wiggly. To help stretch it out before use, I’ll be using a lead vice to hold one end of the came in place.
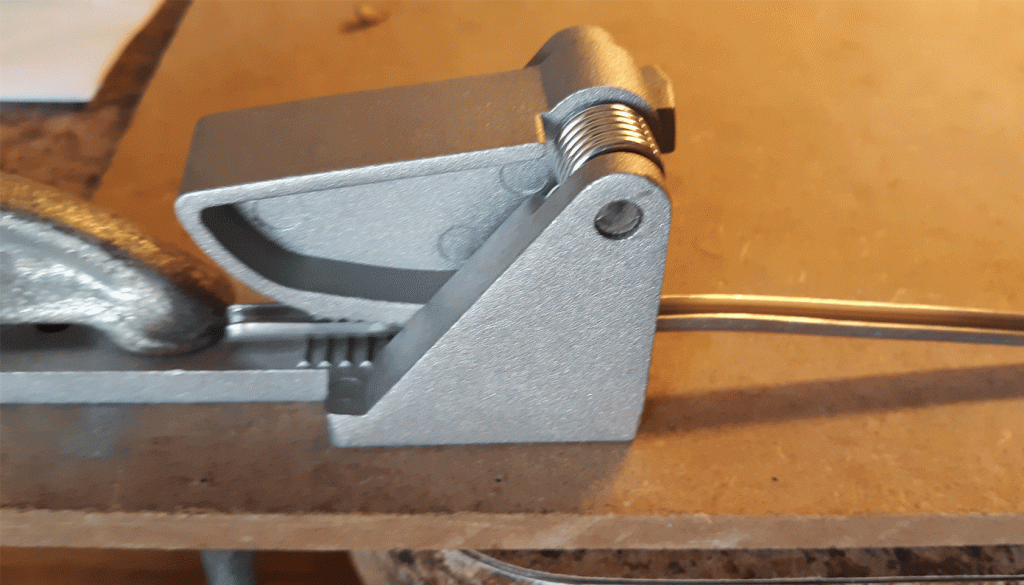
Grab the opposite end with a pair of pliers and tug on the came in a series of quick jerks. doing this will remove the waviness from the came and help to make it firmer.

Attaching the Came
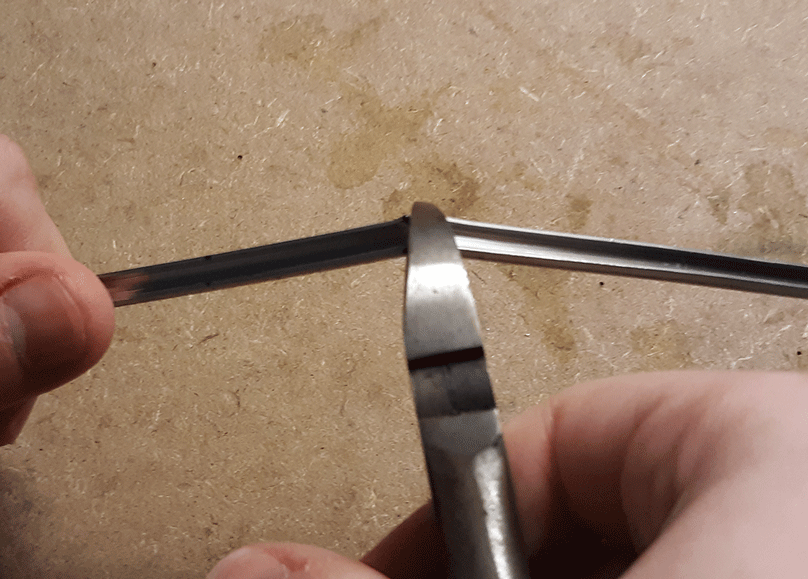
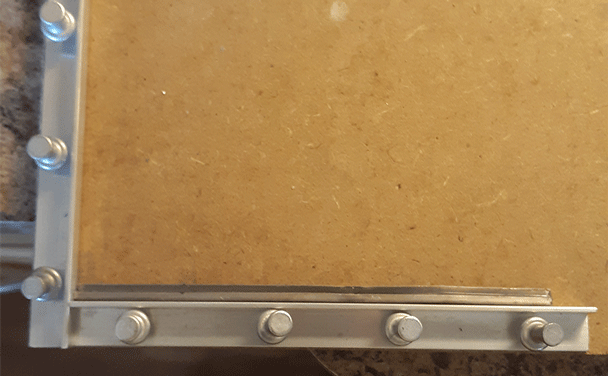
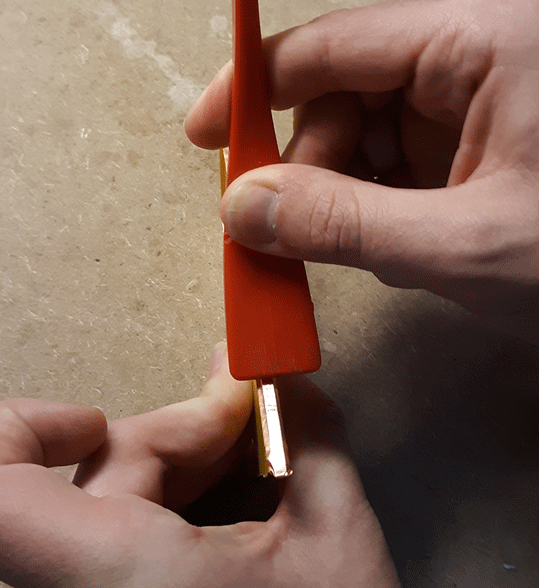
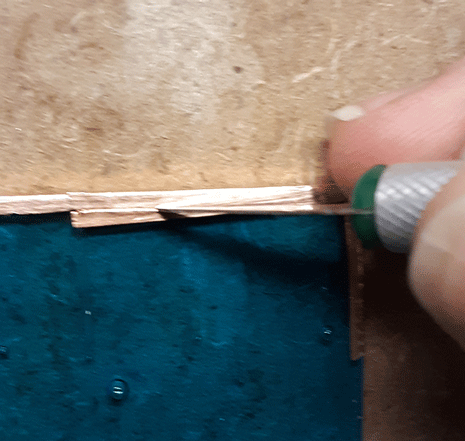
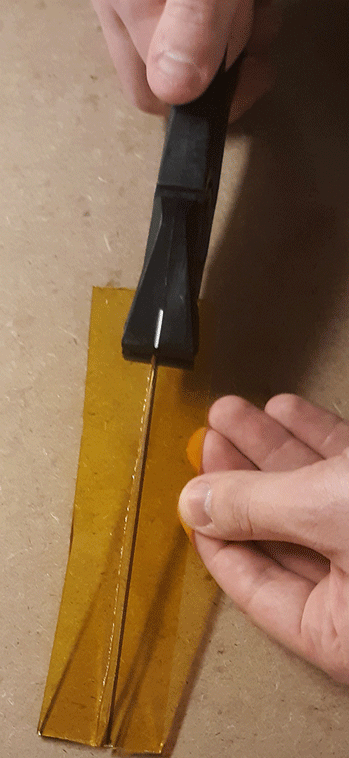
The first thing you’ll want to do is measure the edge (preferably the bottom) of your project and mark a spot about 1/2 inch beyond the right edge.

Next, line the came up with the ruler and mark your measurement with a marker.

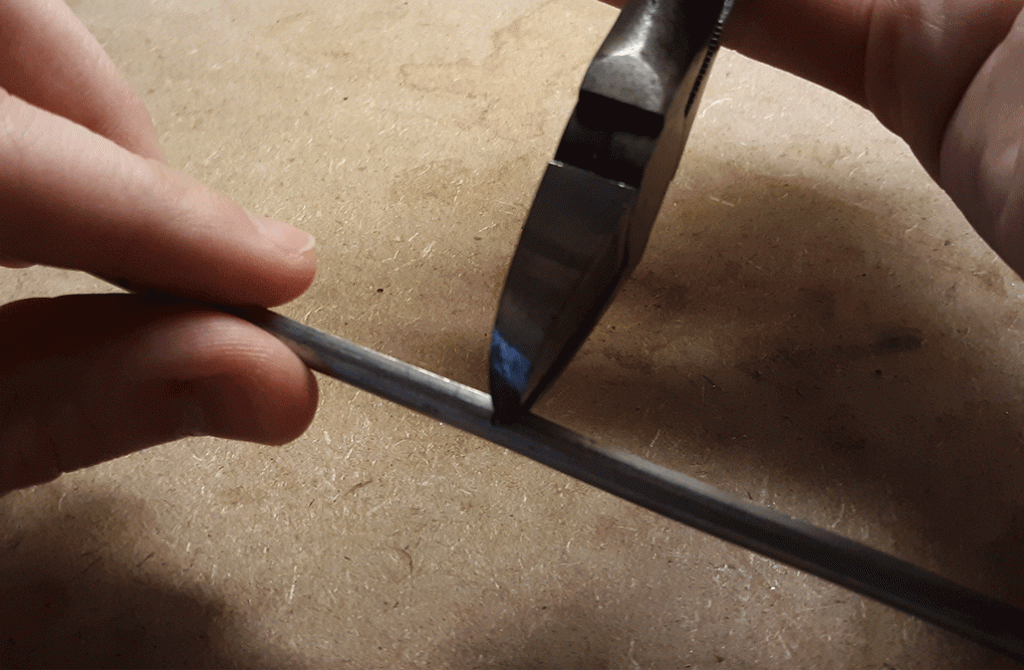
Now cut the came at the line you marked. I found that you’ll get a cleaner cut if you first snip the sides of the came first before cutting through the top.
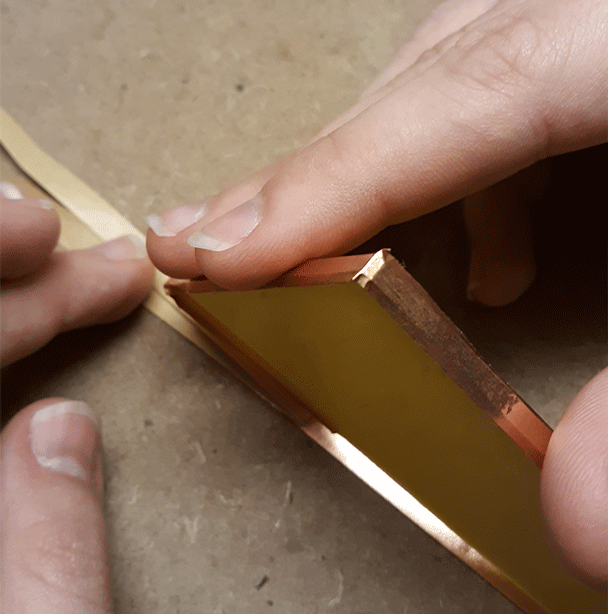
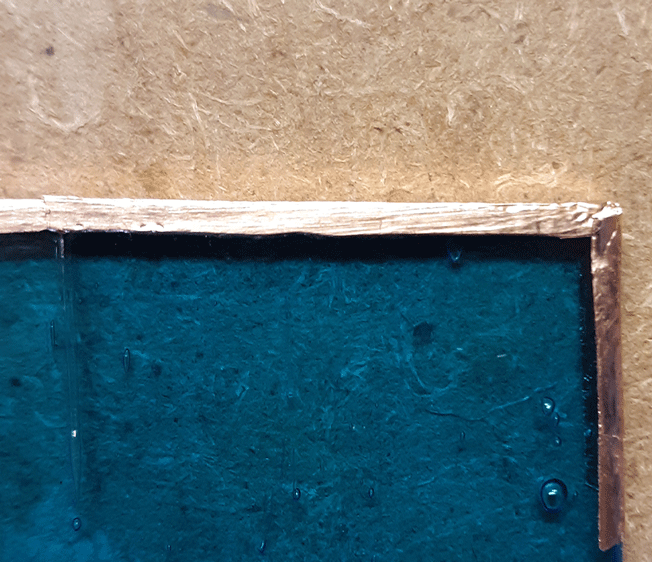
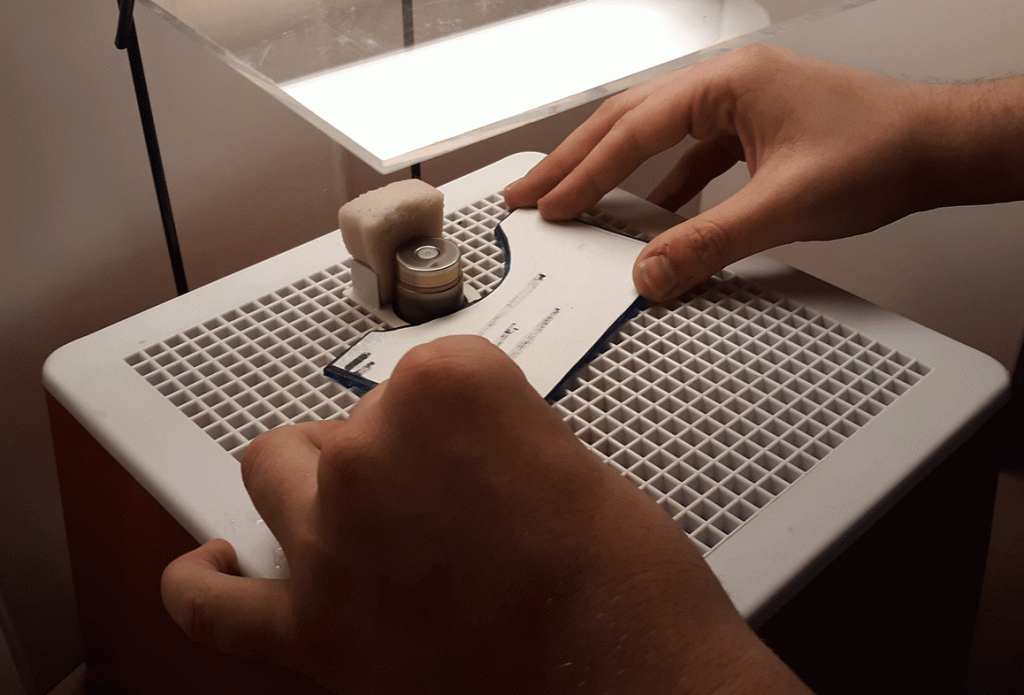
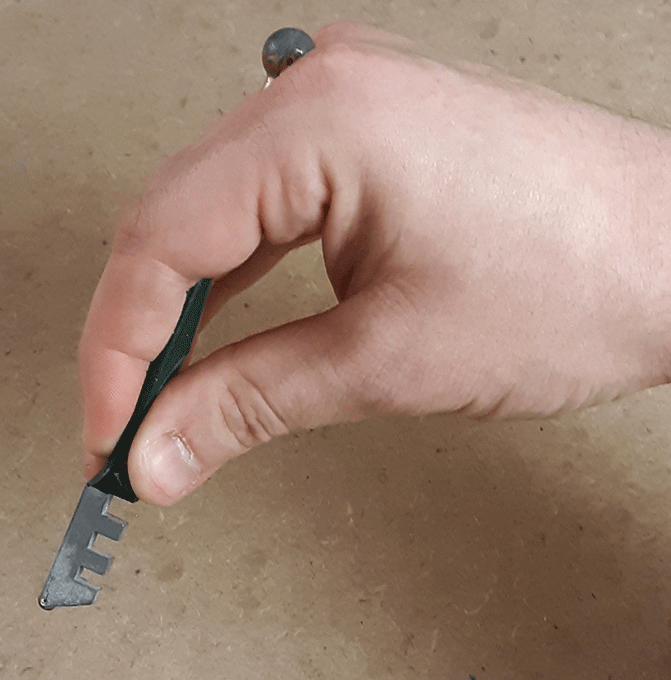
Once your came is cut, set up your thumbtacks and jigs again and place the came on the bottom jig. Then take your project and slide the edge of it into the inner channel of the came.
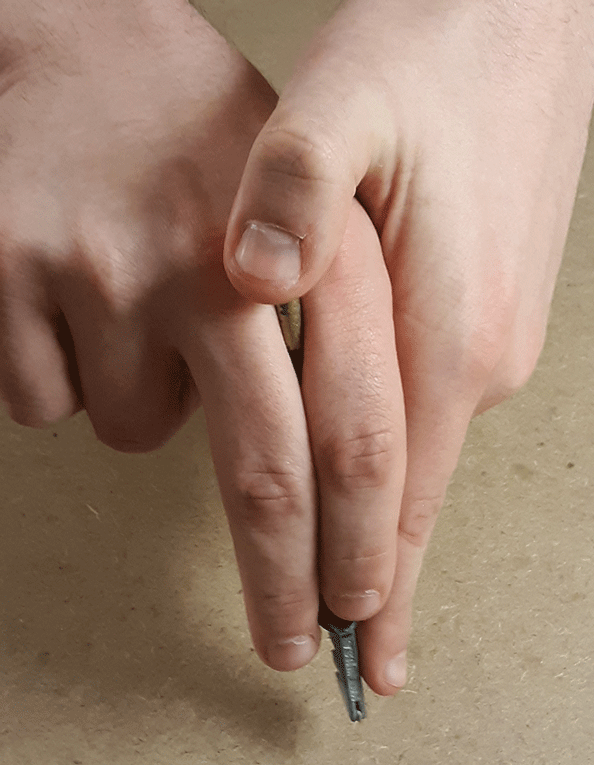
After that’s done, repeat the process on the left side of your project. Once the lead came is in place, shift your project to the left so that it fits into the came snugly.

Repeat the steps done in the left side for the right. Once its in place, add a jig to the right site to hold the came in place. In order to fit came to the top of your project, you’ll have to measure it so that it fits between the left and right sections of came. If your having trouble getting it to fit, I recommend taking a high grit piece of sandpaper and filing down the edges of your came so that it fits.

Once your final piece in in place, hammer some thumbtacks to keep it in place.

Like I said, this weeks post was shorter than usual, but next week we’ll be covering how to solder your came together and how to add hoops to your project for hanging.
Filed under Uncategorized | Comment (0)Solid Soldering and How to Achieve it
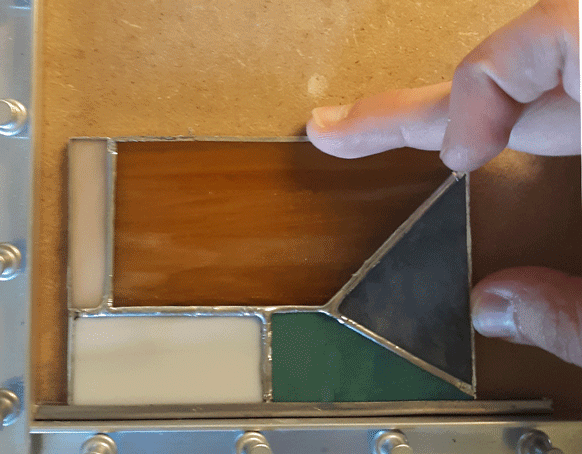
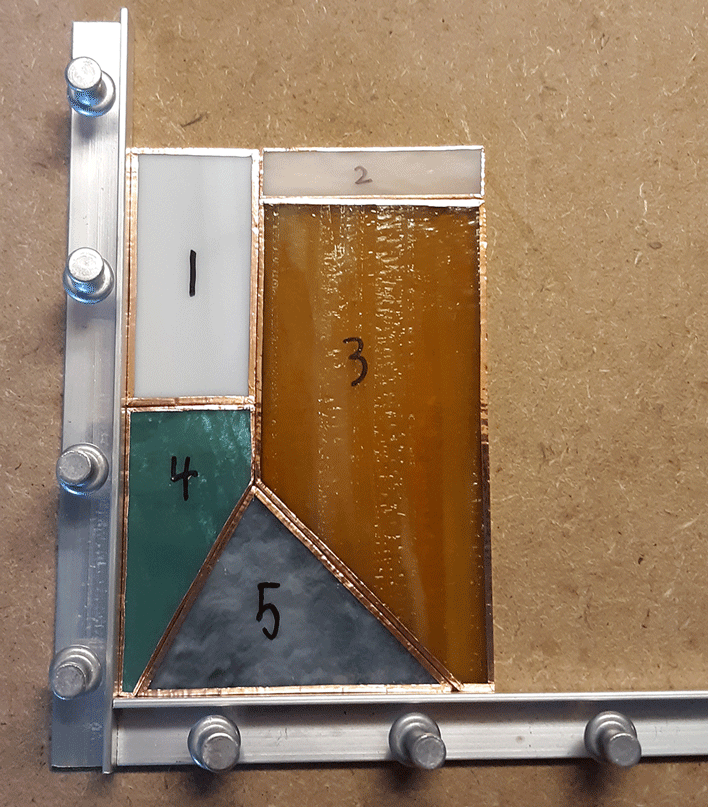
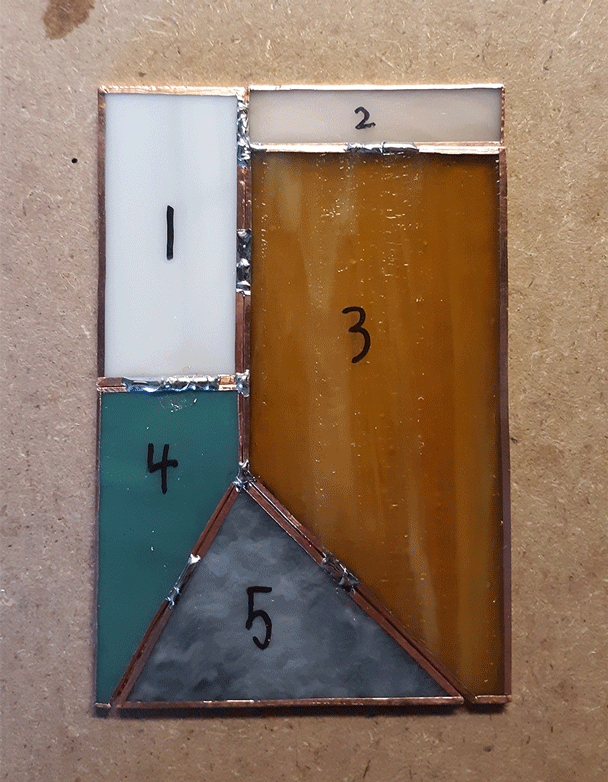
Now that we’ve set up our workstation for it, it’s time to start soldering your project! To better explain some of the processes involved in this week’s post, I’ve taken some scrap pieces of glass I had laying around and constructed a little demo project.
Note: Remember to make sure you’re in a well ventilated room when you plan to solder. The fumes immitted due to melting solder contain toxins that shouldn’t be inhaled.
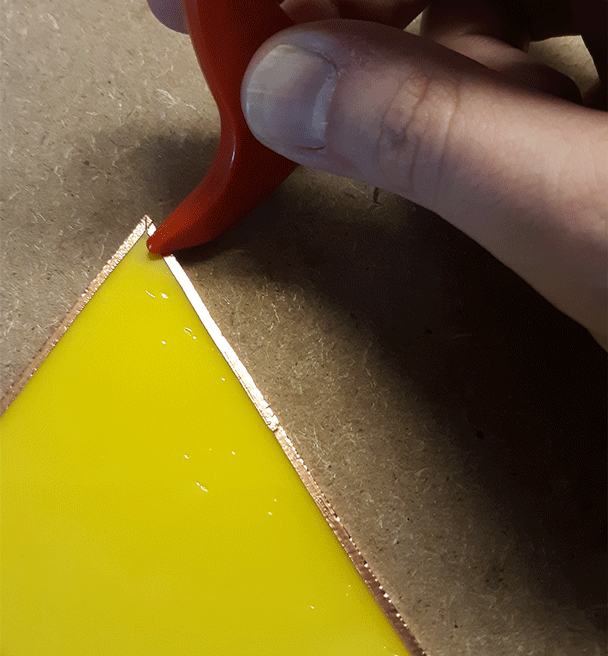
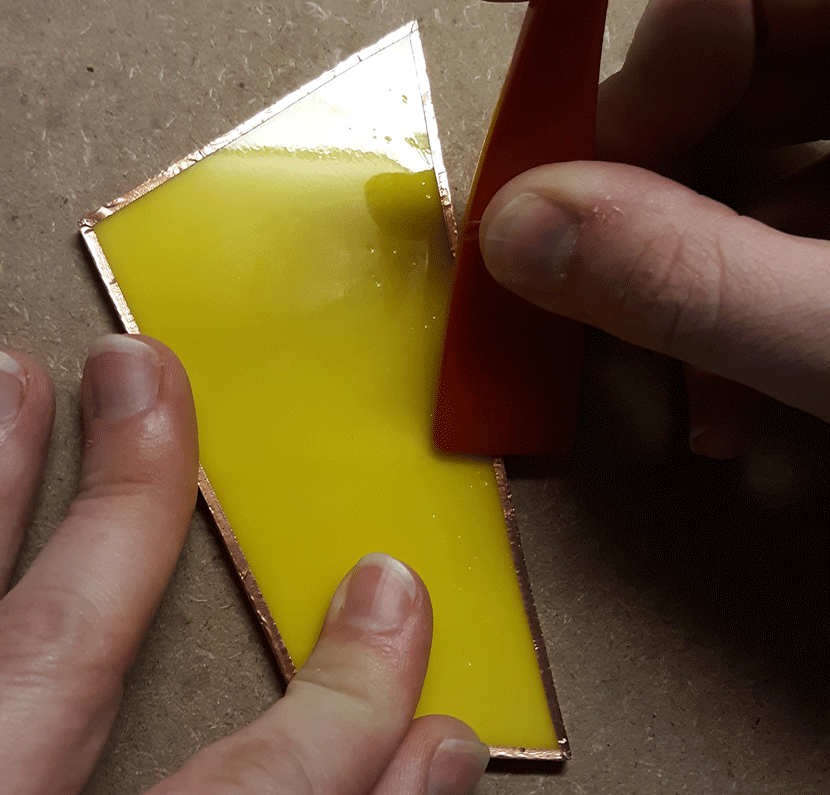
Fluxing your Project
Use a small brush to apply flux to all the foiled edges of the piece. Flux removes oxidation and other dirt from the metals surface prior to soldering. Remember, solder will not bond with the foil unless flux is applied to it first.
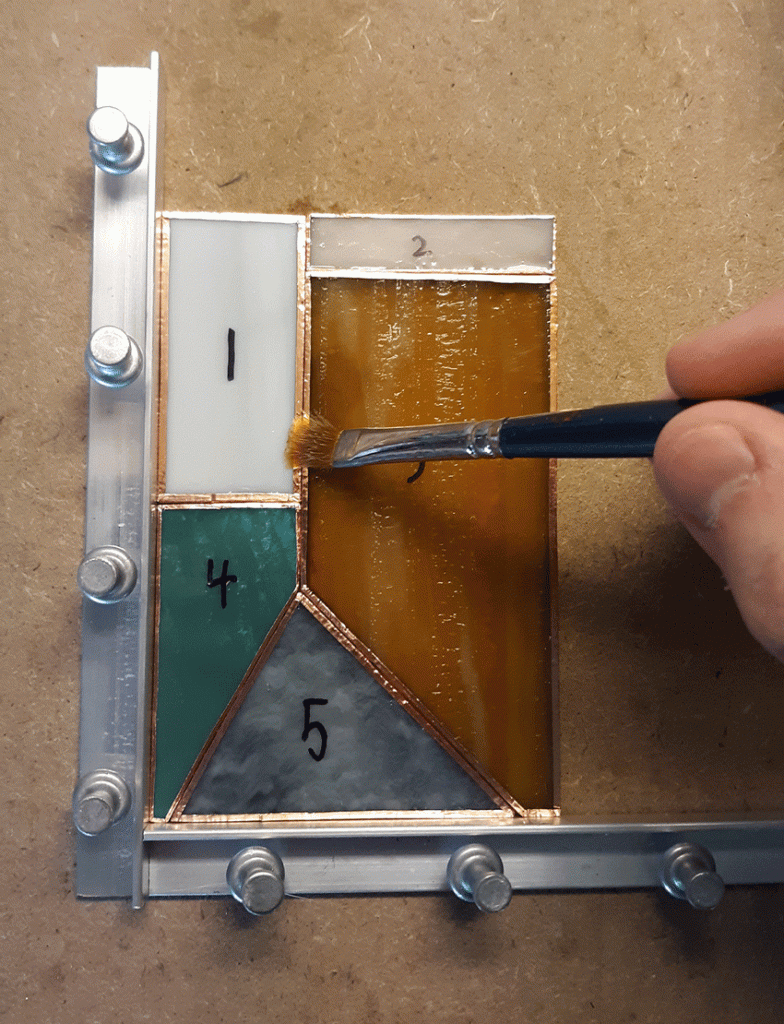
Getting flux on the glass wont harm it in any way, so feel free to apply flux liberally to the foil. It’s important to note that soldering must be done within a few minutes of applying flux, otherwise the flux might evaporate and make soldering difficult if not impossible. If this happens, simply reapply flux to the needed area and continue soldering.
Tack Soldering your Project
Now what is tack soldering? Tack soldering or “Tacking” is the process of applying small amounts of solder to the joints of your project. It’s meant to hold the pieces of your project in place while you’re adding the solder lines, or “Beads” as their called, to your project.
Beguine by unspooling a strand of solder, making sure it’s long enough for you to handle comfortably when reaching the different areas of the project. I preferer to keep the strand attached to the spool. Doing this allows for the spool to act as a handle while soldering. Also, if my solder strand gets too short, I just unspool more solder.
To tack solder, simply place the tip of your solder strand against the foil you intend to solder, then touch the hot iron to the solder quickly – no more than a few seconds – to melt a small amount of it. Then lift the iron a short distance, allowing the molten solder to flow onto the foiled pieces. After doing this, the solder will cool almost immediately and hold the pieces together.
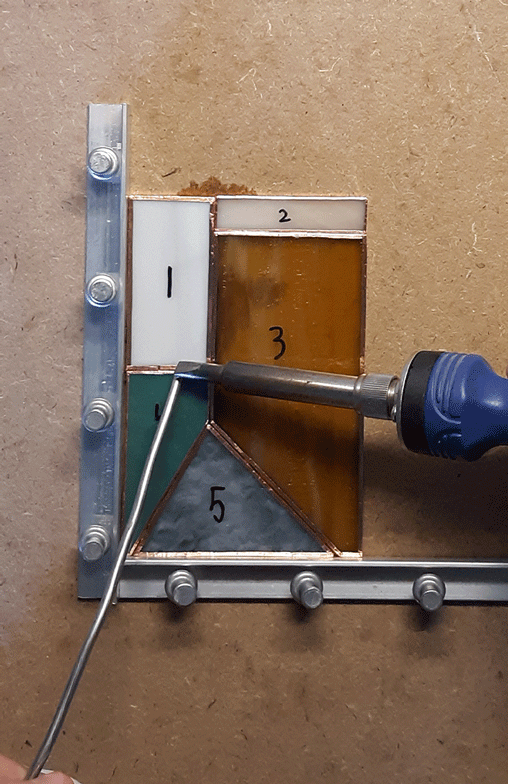
Because it’s meant to hold your glass pieces together, you don’t need to tack every part of the project. Just make sure to tack solder areas of your project where two or more seams intersect.
Once the tacking is completed, remove the jigs from around the project and place them to the side. This is done to prevent you from accidentally soldering a jig to your project.
Soldering Seams
You’re now ready to solder the seams of your project. This is perhaps the trickiest technique you will encounter during soldering, and it’ll take some trial and error to get it right. To be honest, it’s a technique I still haven’t fully gotten the hang of, so don’t feel discouraged if you’re having trouble.
Soldering along seams involves a set of two different steps: applying a proper amount of solder to a fluxed area of copper foil, and then smoothing it out along the seam to form a slightly raised line of solder called a bead. Position the end of the solder and the soldering iron tip near each other over the end of the foiled seam you intend to solder. Gently touch the tip of the solder and the iron together for an instant and remove a 1/4-inch hunk of solder. Let the solder flow onto the foil, pulling the iron towards you at a speed that allows the solder to cover the foil. Then lift the iron straight up from the solder without brushing forward or backwards, as this will create lumps and uneven spots in the bead.
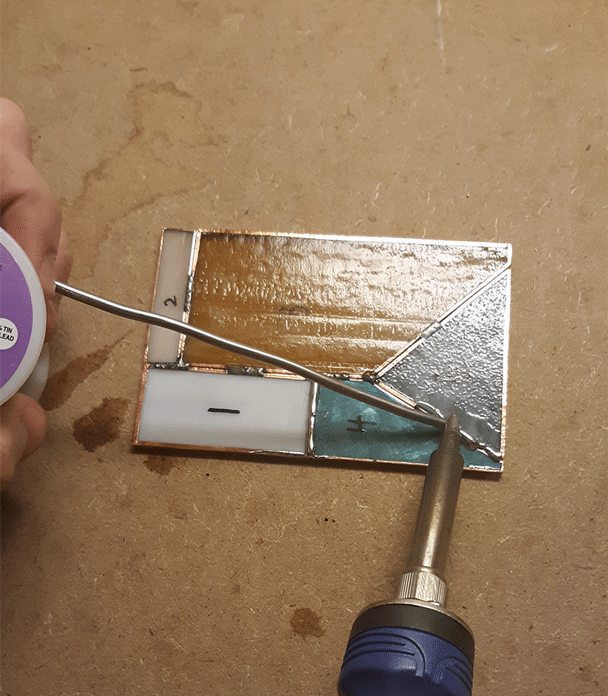
If the solder you added doesn’t completely cover the foil, melt more solder to the bead. If you apply too much solder, simply use the tip of your iron to peck away and remove solder from the very end of the bead.
Once you’ve finished making your first line, immediately reposition both the iron tip and solder strand over the next section of coper foil and repeat the process.
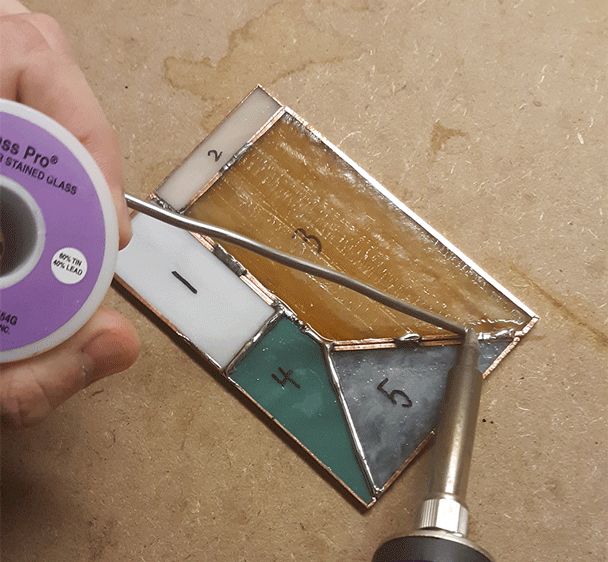
As you work your way around the project, you’ll encounter cooled areas of solder you applied earlier. To merge and old solder line with a new one seamlessly, touch your iron onto the end of the cooled solder to heat it. Immediately apply the new solder to the foil and allow it to flow smoothly to join up with the other solder.
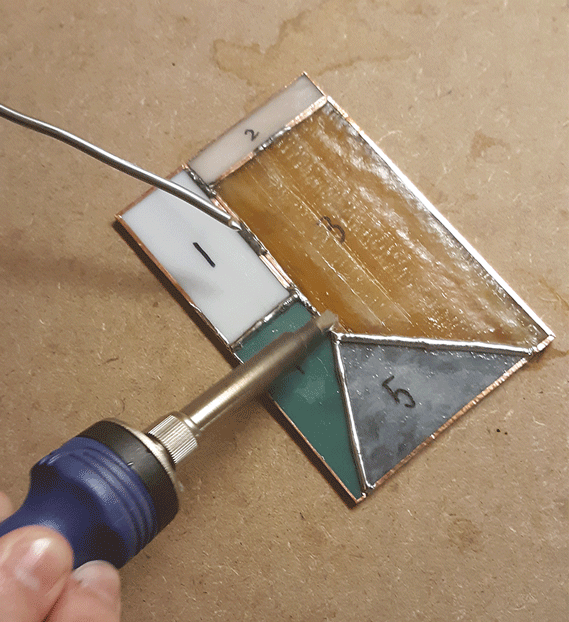
Once you’ve soldered all the seams on the front of your project, flip it over and solder the seams on the back.
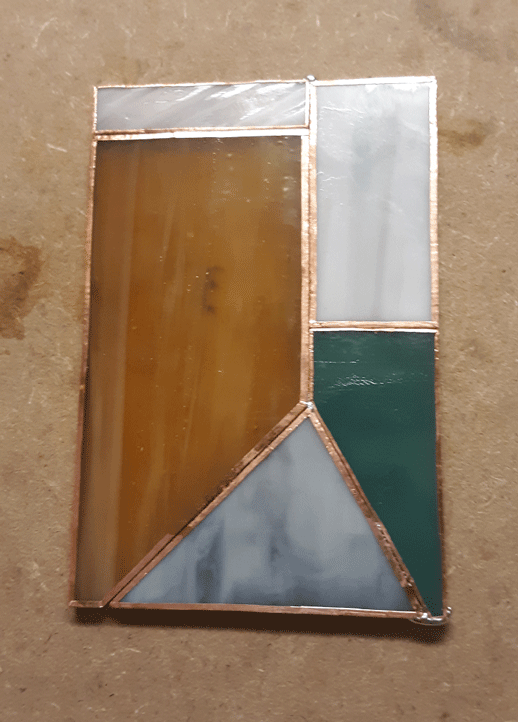
After both sides of the project have been soldered, you can correct any uneven sections of solder beads you find by simply touching the iron to the uneven area and holding it there for an instant. When making corrections, be sure to hold the iron in one spot for no longer than a second because it might overheat the foil and cause the solder on the underside of the project to re-melt. If this happens the solder on the top side of the project will become indented and a large mound or blob of solder will form at the same spot on the underside.
Additionally, make sure the foiled outer edges of the project are free of solder, particularly where a seam meets the edge. Remove any pieces of solder you find by touching them with the soldering iron.
Coating the Outer Edges
Now since I’ll be covering how to apply lead came to your project in an upcoming post, this part isn’t really necessary. But for anyone that doesn’t want to use lead came, the next step would be to coat the outer edges of your project in solder. Instead of applying beads of solder like you did on the front and back of your project, you want brush a very thin layer of solder over the remaining sides of foil. To do this, quickly tap your strand of solder to the iron tip in order to gather a tiny amount of solder. Then drag your soldering iron across the foil, almost like your painting the solder on. Once you’re done, the projects edges should resemble the images below.
Soldering, like many other steps involved in stained glass, requires practice and patience if one wishes to perfect it. Hopefully this post helps save you a lot of time and frustration when working on your own projects.
Filed under Uncategorized | Comment (1)Soldering Setup: What you need to Succeed
Hey everyone! This week’s post is going to be a bit shorter than usual, but it’s still important nonetheless. There’s quite a bit of information to cover when it comes to the soldering step of stained glass, so I’ll be going over the tools and materials you’ll need before you start.
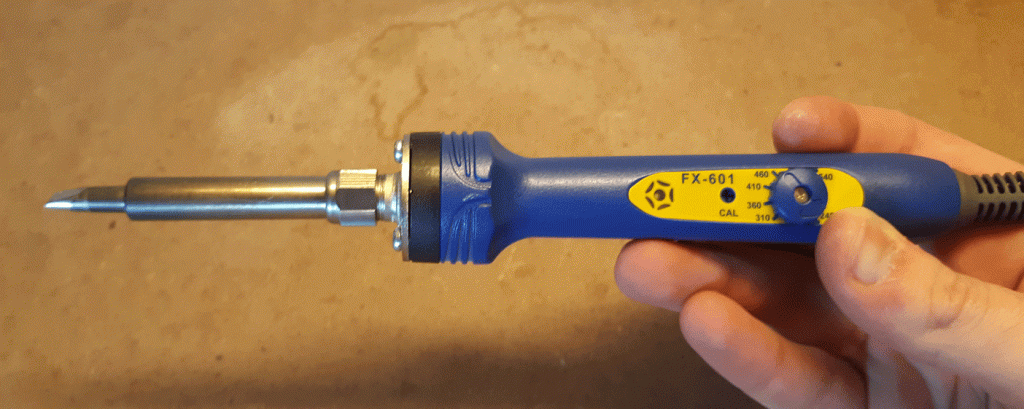
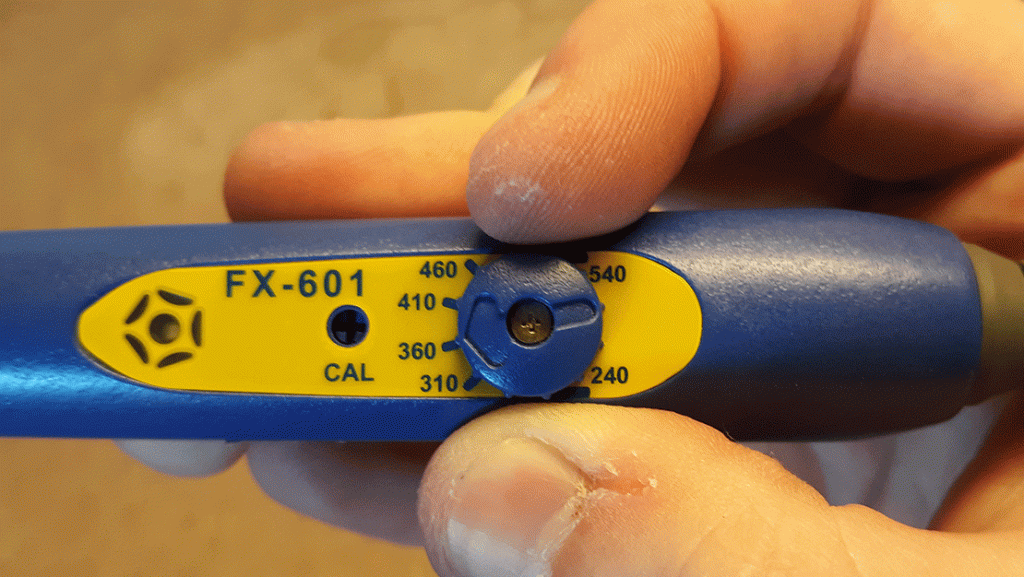
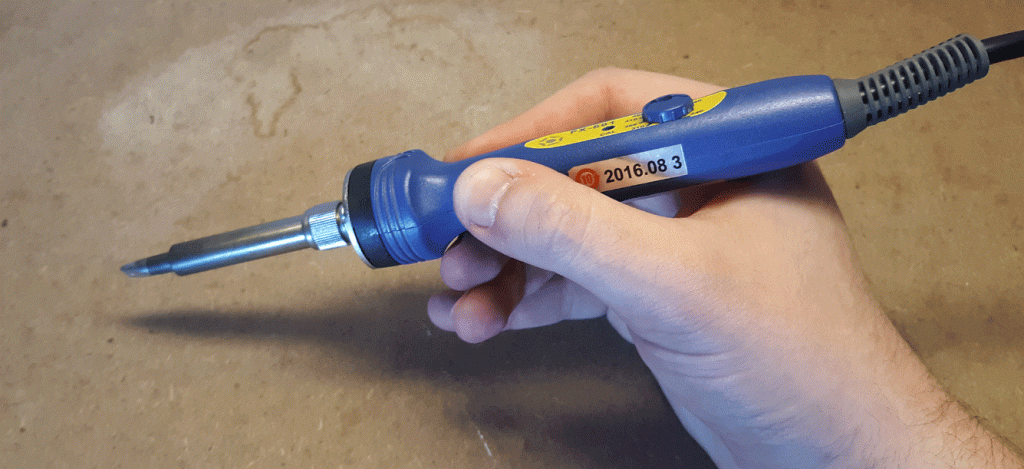
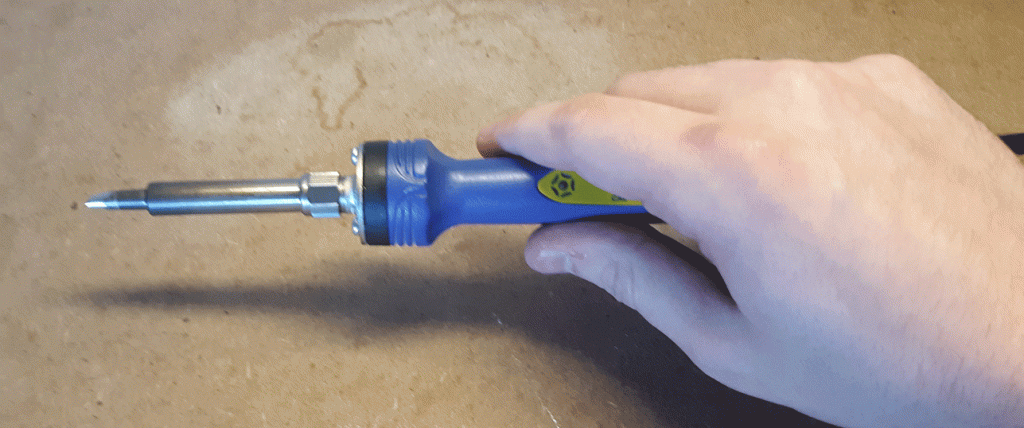
Soldering Iron
The quintessential tool you’ll need in order to solder is a soldering iron. These can come in different sizes with all kinds of attachments. For example, the one I have below has a built-in nob on the side of the handle for adjusting the irons temperature.
Before you beguine soldering, you’ll want to experiment a little to find what kind of grip is more comfortable for your hand. I like to grip my iron like I would a pencil, while others may preferer to hold theirs like a flashlight.
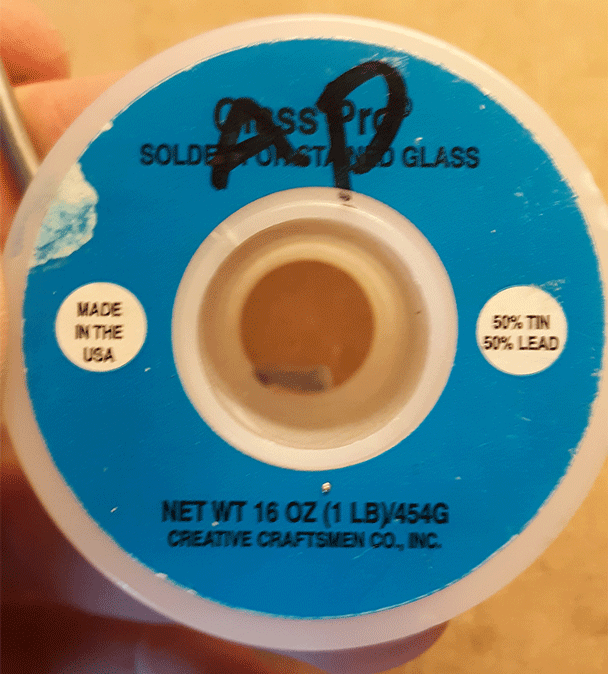
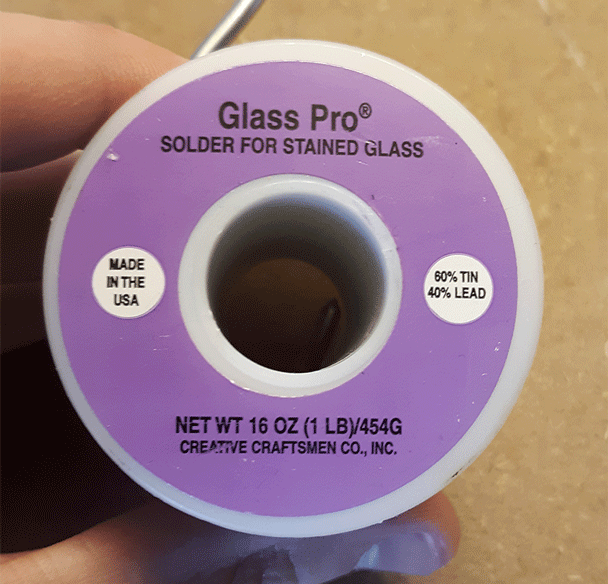
Solder
Like I said in one of my previous posts titled Tools of the Trade, solder is an alloy (a mixture of two or more metals) comprised of tin and lead. The most common solders contain a 50-50 or 60-40 ratio of tin to lead. The difference between the two solders is that 60-40’s composition allows for it to flow more smoothly and is easier to work with than the 50-50 blend.
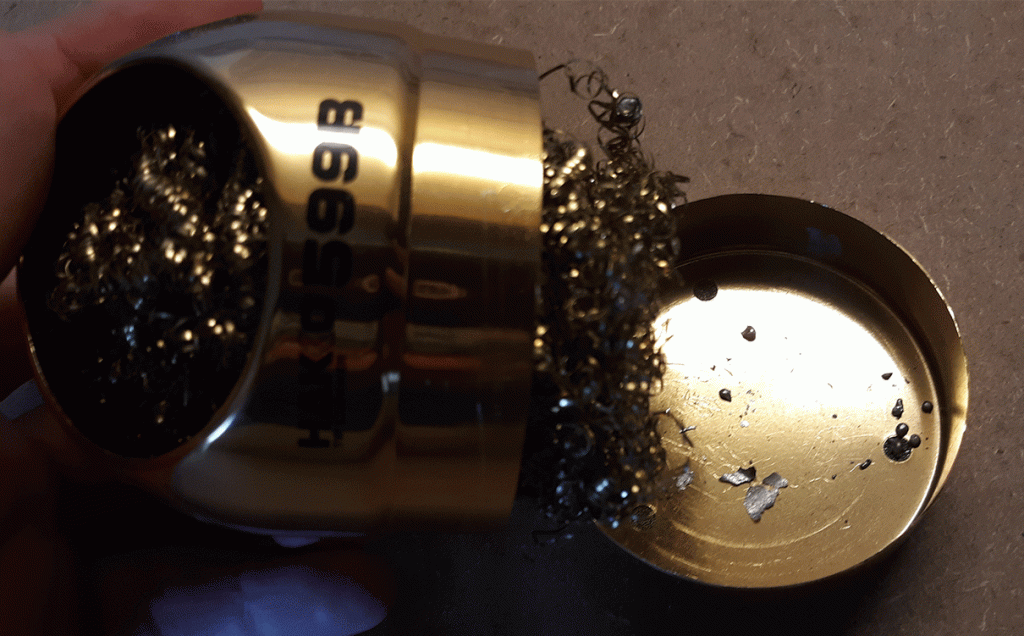
Tip Cleaner
The tip cleaner is what you will use to remove excess melted solder from your irons tip. Back in the day, glass artists would wipe their irons against a wet sponge to remove solder. However, this method would often shorten the lifespan of the soldering tip.

To clean your tip, simply press your iron against the steel wool of the cleaner while pulling the iron down and away from it. Once your done, pull off the bottom of the cleaner and dispose of the melted solder.

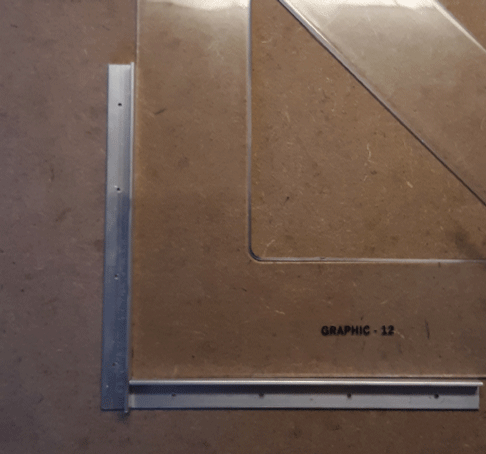
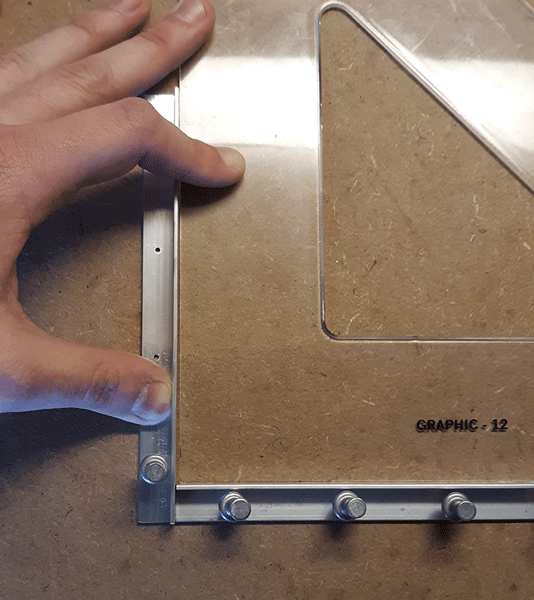
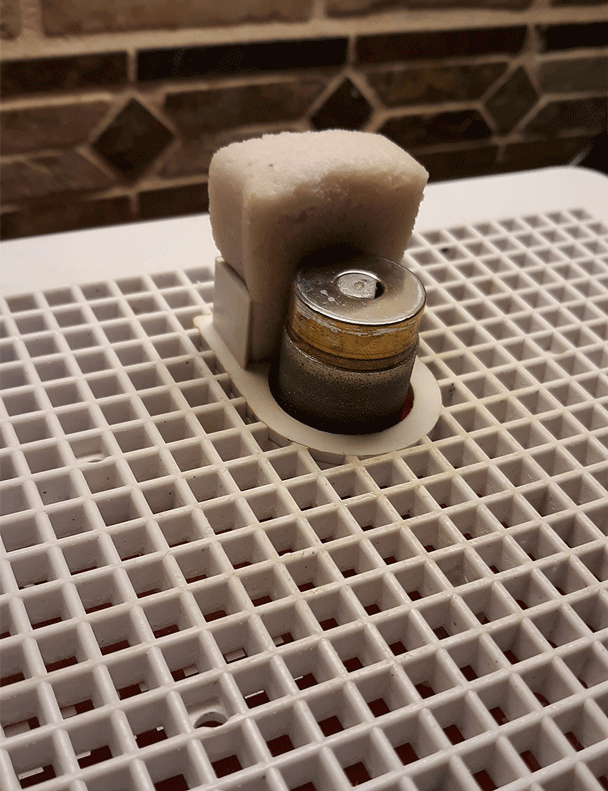
Thumbtacks & Jigs
Thumbtacks and Jigs are used to hold glass in place while you tack them together. These are great to have since it’s often difficult to free-hand the tacking process without having your pieces wobble out of place.

I found it easer to set up my Jigs using a tri-square before putting in the thumbtacks. This is so I’m sure their at a 90 degree angle. Then I place two tacks at either ends of a jig to set them in place before setting in the rest.
Copper Foil: Types, Application, and Trimming
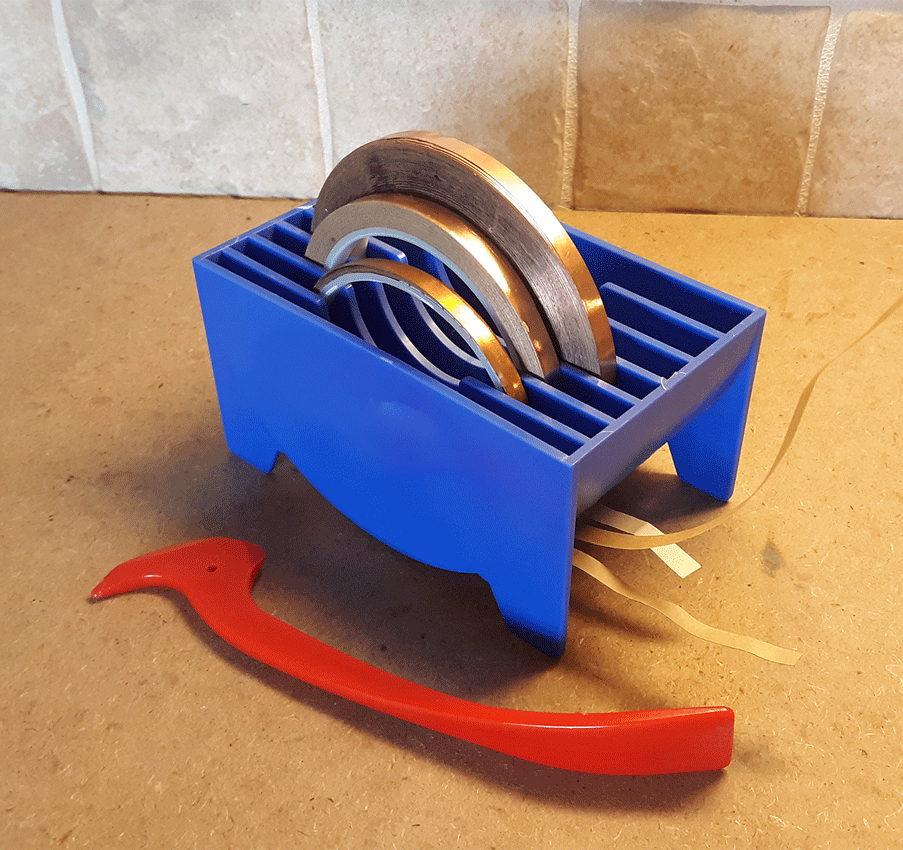
After grinding down the edges of your pieces, you’ll need to apply copper foil around them. The reason we use copper foil is because it acts as a surface for liquid solder to bond to. Most foil sold for stained glass comes in tape like rolls that have an adhesive backing to better stick to the glass.
In the image below I have my copper foil dispenser and fid. If you plan on making stained glass making a hobby, I highly recommend picking yourself up a dispenser. It acts as a handy storage box for my foil rolls that also keeps them from unraveling during use. To assist in the foiling process you’ll want to use a Fid in order to burnish the foil
Types of Foil
First you need to determine what kind of foil your project requires. Copper foil comes in many different widths; the standards being 3/16 inch, 7/32 inch, and 1/4 inch. The desired aesthetic of your project will determine the width of your foil. For daintier pieces where the solder lines are subtle, you’ll want a thinner foil. For a robust and strong looking solder line, use a thicker foil.
There are also two types of copper foil: Standard (Roll on the left) and Blackback (Roll on the right). Standard foil has the same shiny appearance on both sides, while blackback, as the name implies, has a matt-black coating to its back.
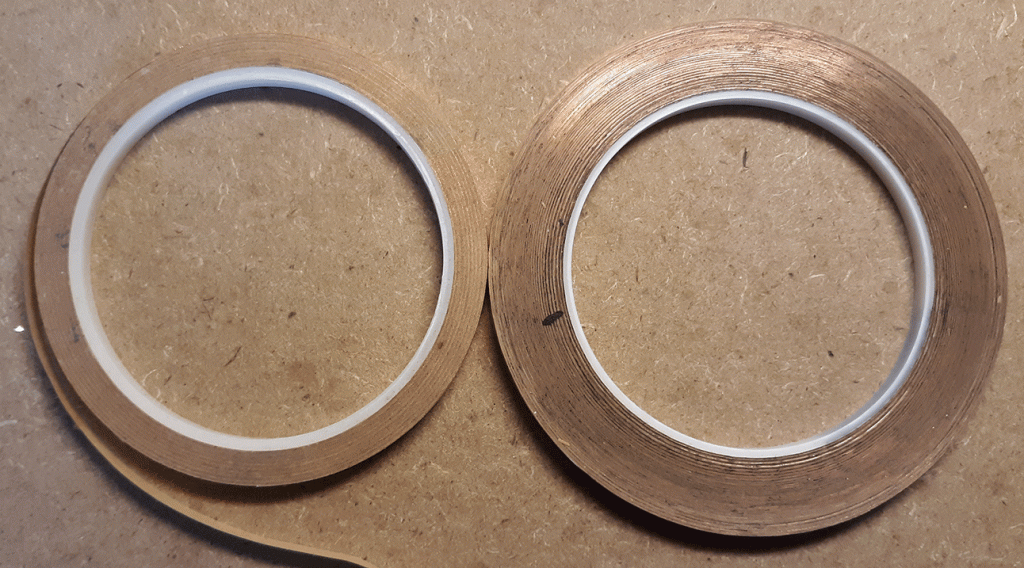
Normally, you’ll want to use blackback foil for more transparent pieces. This is because, depending on were you display your finished piece, light could reflect off the foils back and distract viewers.
Application
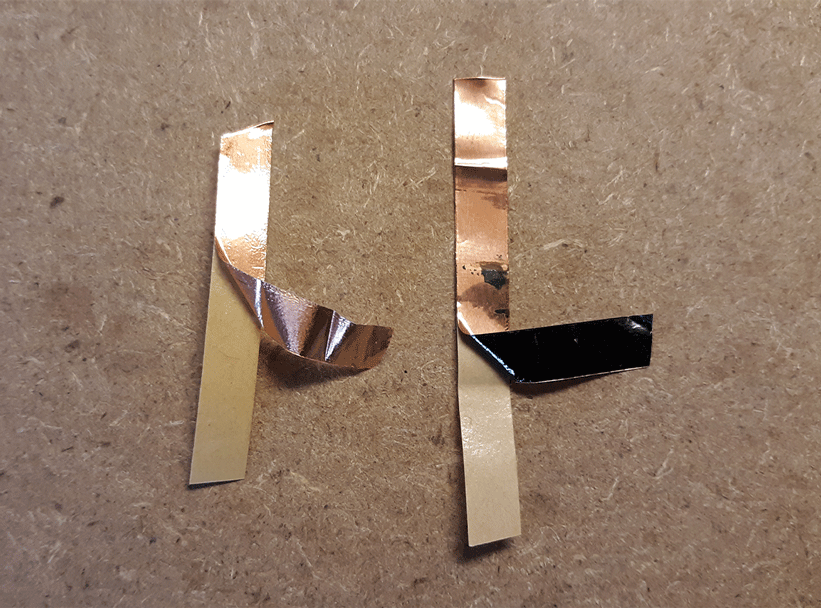
To beguine applying foil to your pieces, start by unrolling a short strip from the roll and peel away the backing from the foil.
Next, apply the foil at the midpoint of one of the sides, that isn’t at a corner edge where it might have a hard time sticking to the glass. In the image below, I placed the foil where my right thumb is located on the piece.
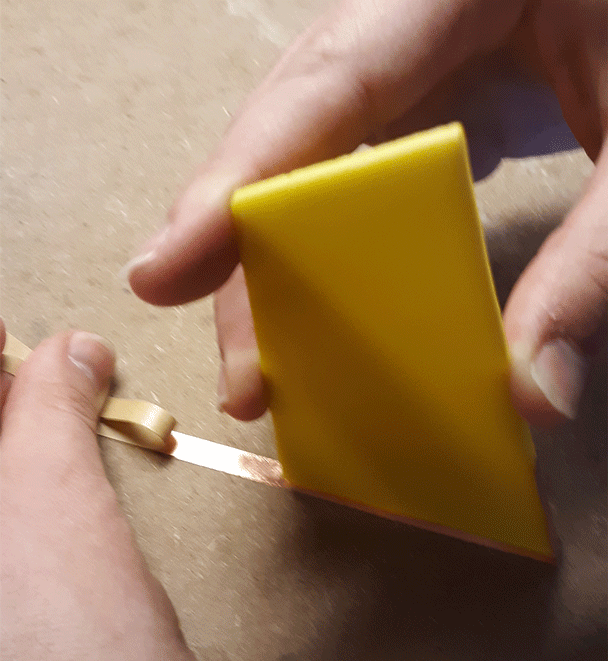
Keep the strand of foil under a bit of tension by pulling is as you press the adhesive side against the edge, turning the piece as you work. Keep the foil centered on the edge, so an equal amount of it hangs over each side.
If you noticed that the foil has been applied unevenly, simply peel it off and reapply it so that it’s straight. Don’t peel and reapply the same piece of foil more than a few times, otherwise the adhesive may lose its stickiness.
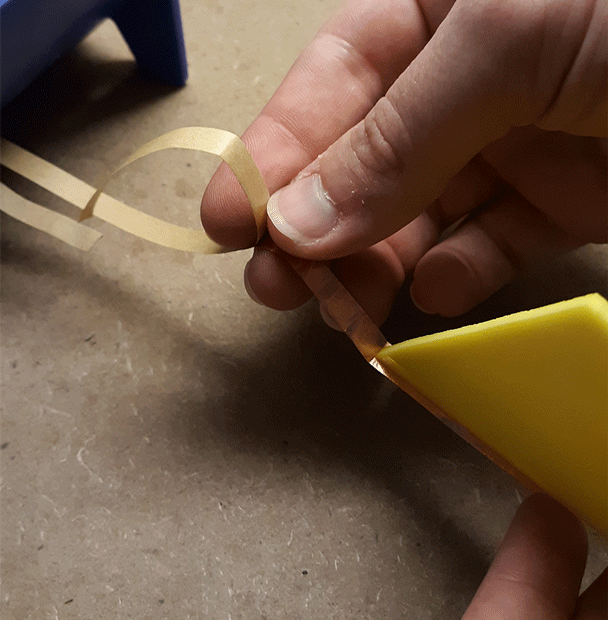
Continue foiling around the entire edge of the piece until you reach the starting point of the foil. Overlap the front and back ends of the foil slightly, trim the foil, and carefully fold down the overhanging edges so they stick to the glass.
Once that’s done, carefully fold down the overhanging edges so they stick to the glass. I found the best way to do this is by using your index finger and thumb to fold down a small part of the foil. Then carefully pinch and pull your fingers across the glass until the foil sticks.
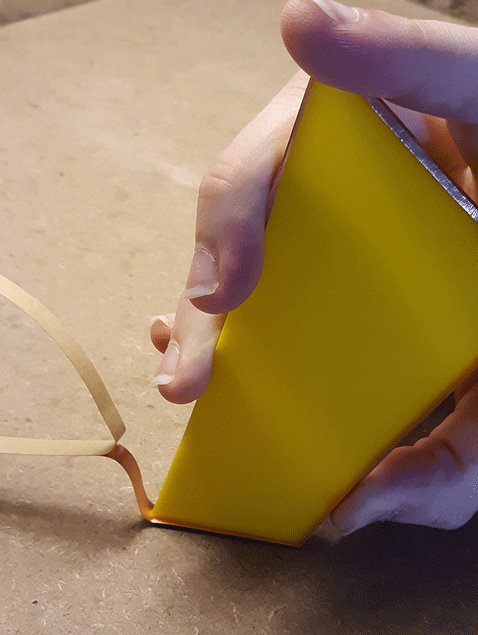
Now that your copper foil is wrapped around your piece, take your fid and press down any raised areas you see around the edges of the foil.
Then press down on the edges of the foil firmly and slide the fid across it until all the bumps are gone.
Trimming
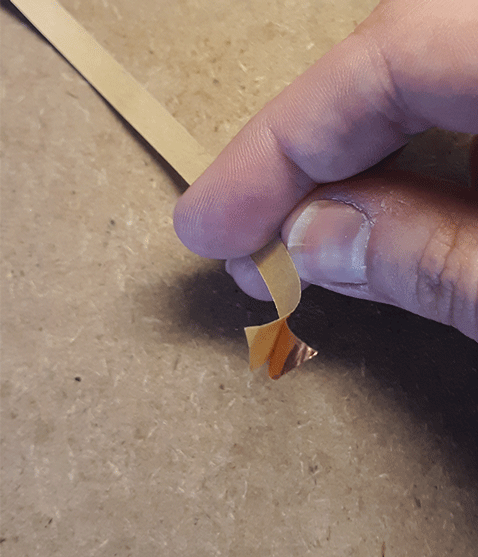
Sometimes you’ll make a less-than-perfect foiling job that can be salvaged with a few modifications using an exacto knife. Below is an example of a foiling job you can correct.
Simply trim the excess foil evenly so that it matches up with the corresponding edge. After making the cut, use the tip of the knife to peel away the excess foil.
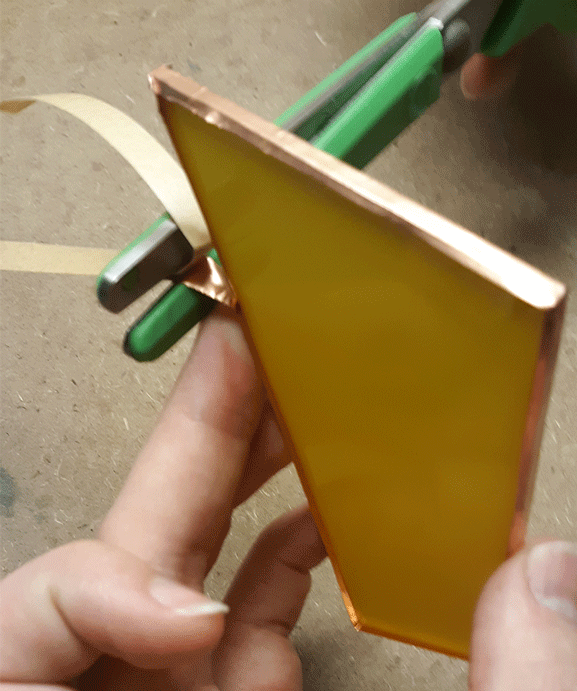
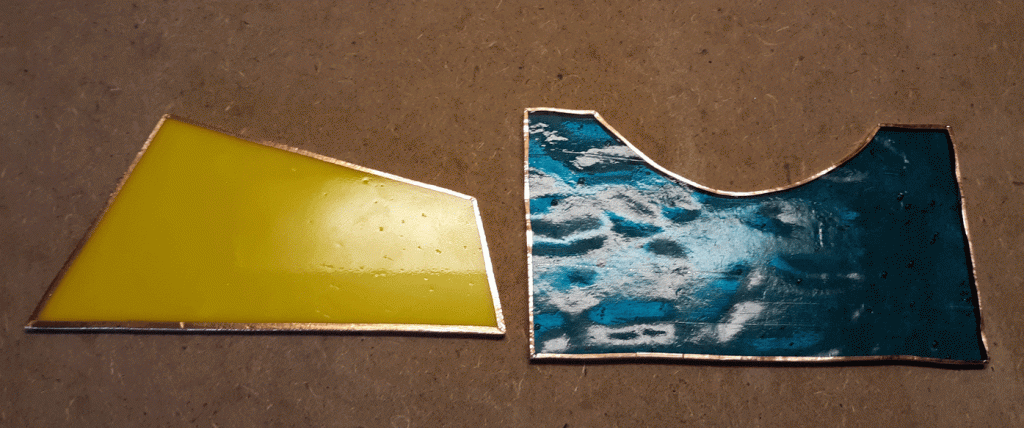
Once you’ve finished foiling, burnishing, and trimming your pieces, they should end up looking like this.
That’s all there is to it! It may take some time to getting use to lining up the foil evenly with your pieces (It took me a while to learn when I started out). But when it comes to developing any skill, time and practice leads to progress. So keep at it!
Filed under Uncategorized | Comment (0)How to Grind your Glass
When breaking glass along a score line, there’s a good chance that it’ll have a few sharp and jagged edges to it.

By using a glass grinder, you’re able to smooth off the rough spots on your pieces. A glass grinder is eventually an abrasive wheel covered with a fine diamond coating which is attached to an electric motor. Once you turn on the power, the motor will spin the wheel, allowing you to grind glass.

Because you’re using abrasion to smooth down the edges of your glass, you’ll want to make sure the wheel is wet. Not only will water reduce the friction between the wheel and your piece, it also prevents tiny particles of glass from kicking off. Typically, glass grinders will have a compartment for holding water that a sponge is meant to both soak up water and apply it to the grinding wheel. While water alone will work fine for cooling the wheel, I like to add a cap-full of grinder coolant as well. This helps prolong the life of your grinding wheel and increases its speed.
Before I take my glass to the wheel, I like to take a paper cutout of my desired shape and glue it to the glass with rubber cement. The paper then acts as a guide to make sure I don’t grind off more than I need to.

Start by placing your glass on top of the grinders surface. Carefully press the edge of the glass against the spinning wheel. You don’t have to apply much pressure for the grinding wheel to polish the glass quickly. Make sure you smooth each edge evenly and make sure corners that are supposed to be sharp and pointy aren’t blunted off.

Its important to note that you don’t want to take off so much glass that you beguine stripping away paper. If you do, there’s a good chance the finished piece won’t fit properly with the others when assembling your project.
Once you’re done grinding all the rough edges on your pieces, rinse them off with soap/detergent to remove the paper template.
Now you have some smooth-edged pieces that are ready for the next step of the process!
Filed under Uncategorized | Comment (1)Glass Cutting: Shape it up
Every piece of stained glass you ever cut will consist of strait lines, Concave curves (those that bend towards the inside of the piece), Convex curves (those that bend away), or a combination of all three. In this post, I will demonstrate how to perform these cuts using three separate shapes.
Normally when cutting out a shape, I would try to position it in a way that would cause the least amount of scrap glass when cutting. But for the sake of these demonstrations, I’ve placed the shapes in the center of the glass.
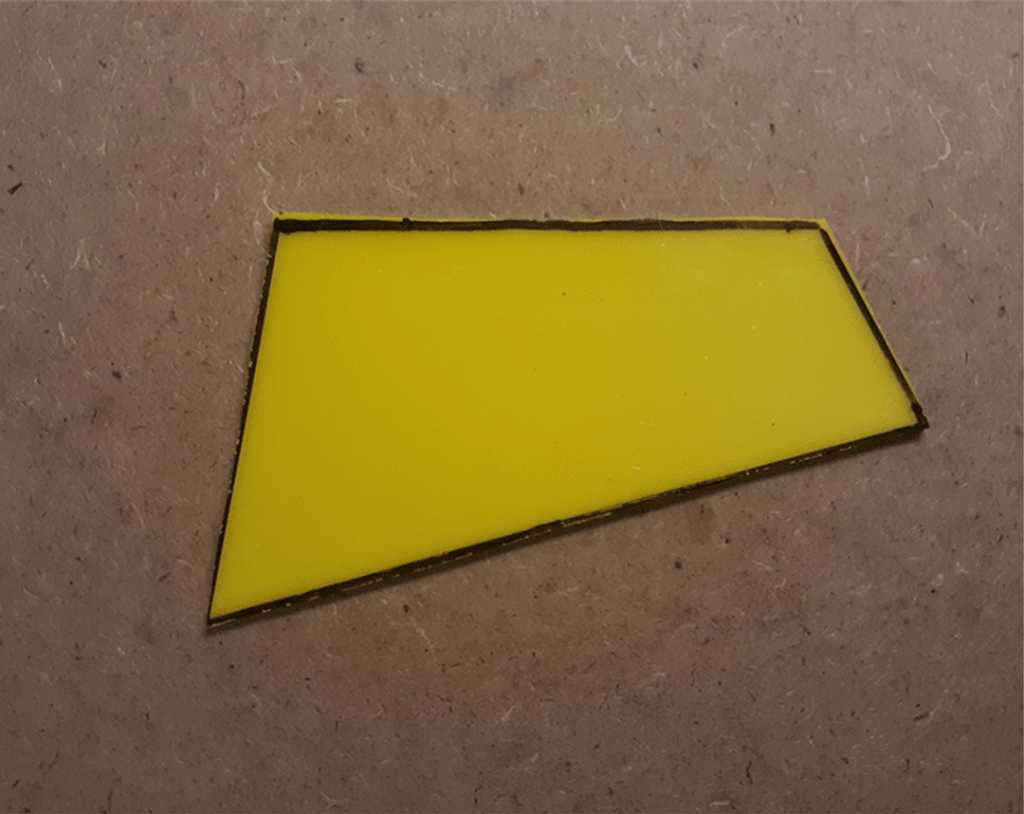
1st Shape – Trapezoid
The first shape we’ll be cutting out is a trapezoid.

Note: The numbers in the images indicate the recommended order in which you make your cuts.
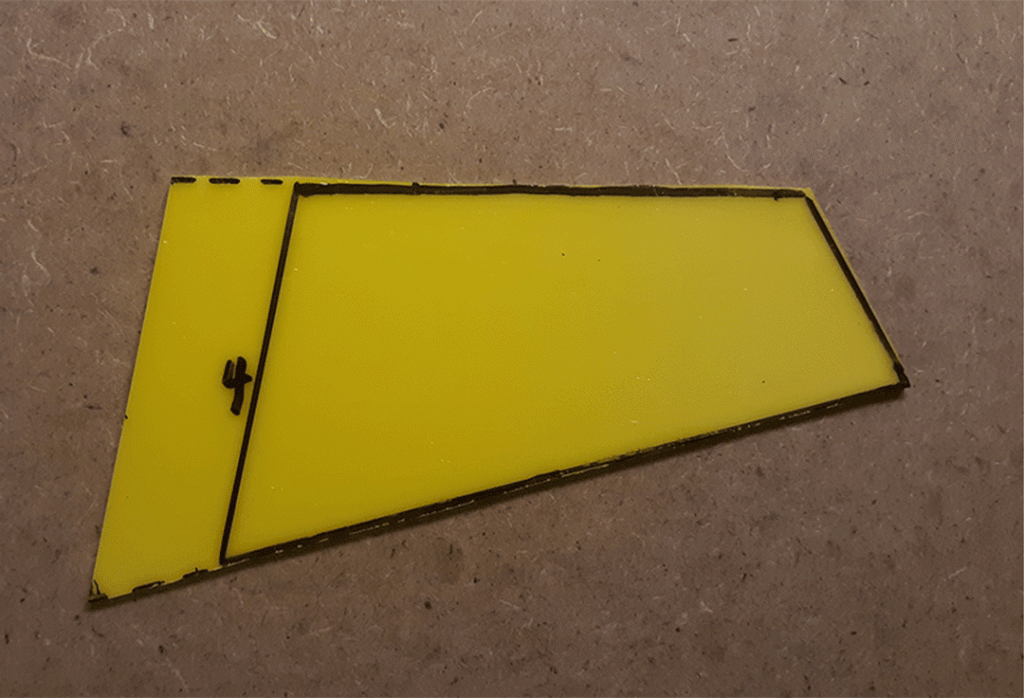
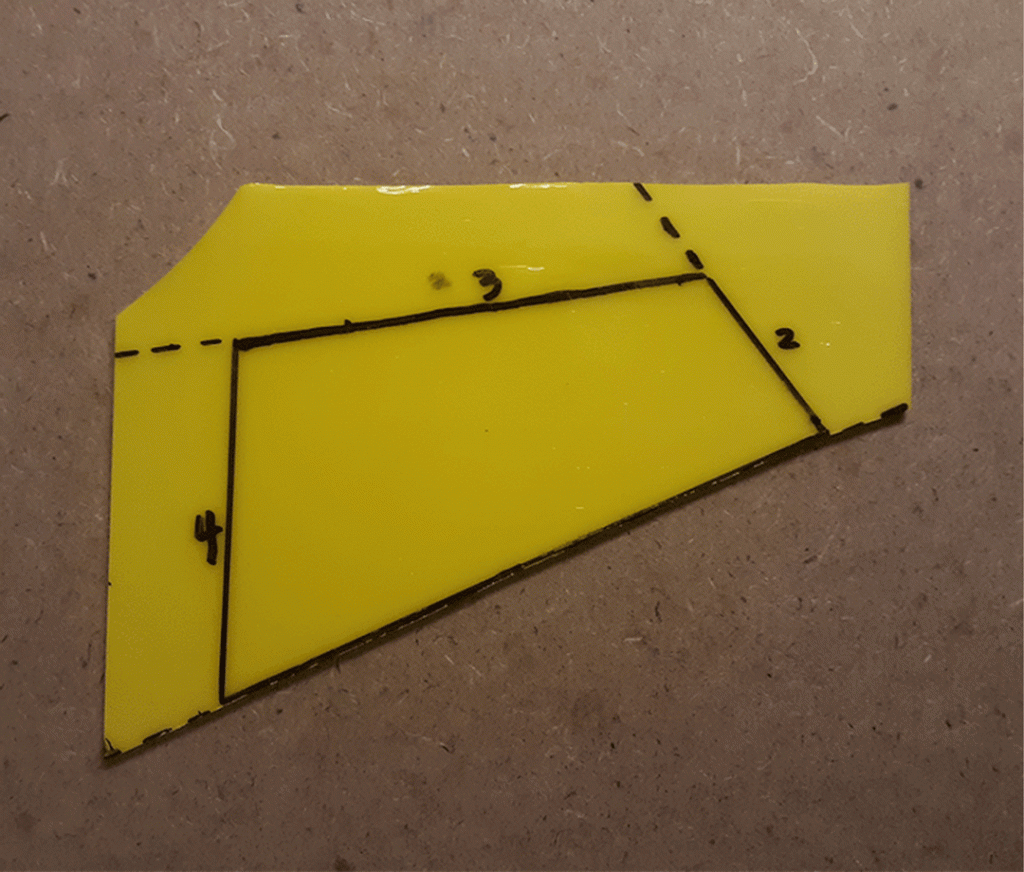
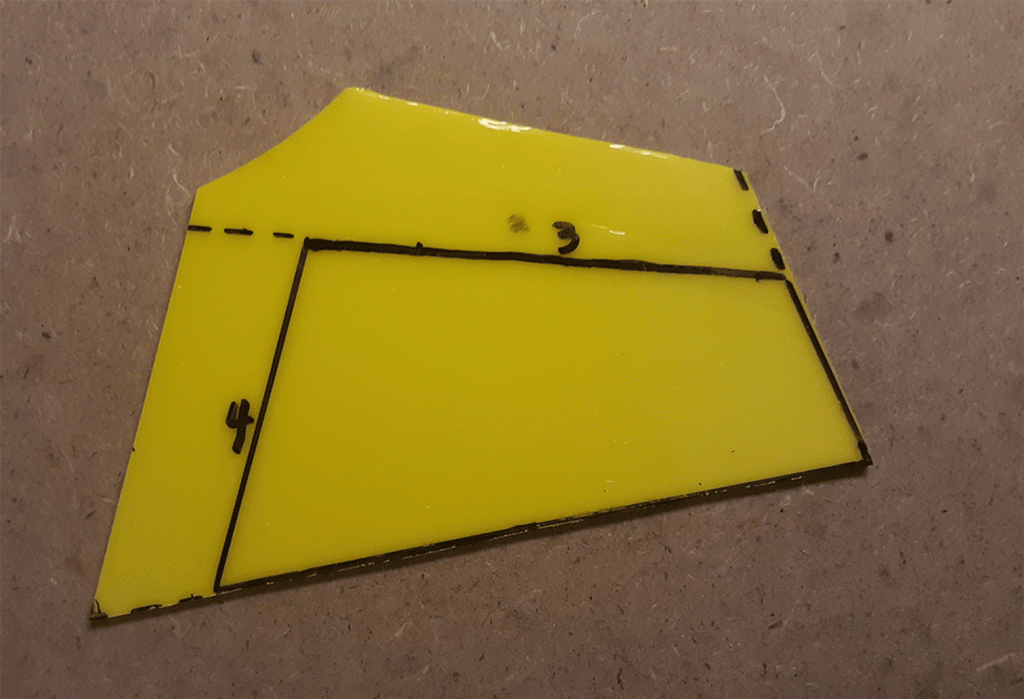
When making more complicated cuts, you should study the template you create and try to visualize how each score will affect subsequent scores.
2nd Shape – Arch
The second shape is what I like to call an arch, which combines straight-line cutting with a tricky to score inside curve.

An inside curve like this one must be carved out through a series of small, archlike cuts that remove sections of glass gradually to reduce the risk of accidental cracking. If you just ran the cutter along the inside curve in one score and tried to break it, the glass would most likely cause the piece to split jaggedly outward towards the edges.
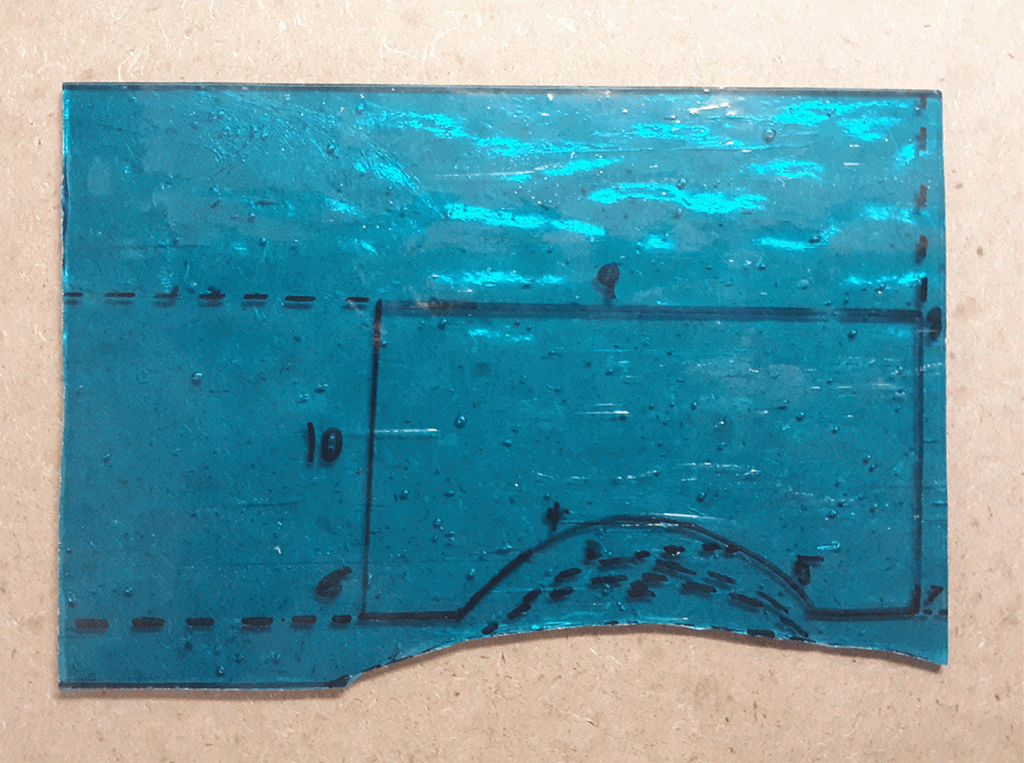
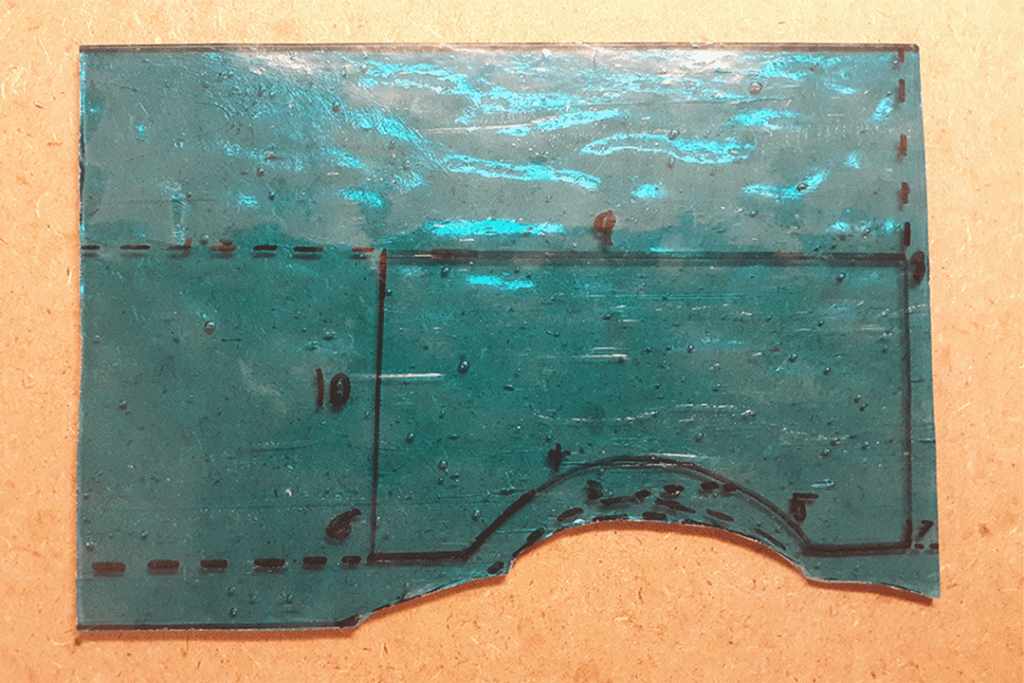
There will be times were you might have to re-draw a line in a different position in order to cut out the shape.


With the tricky part out of the way, continue making straight cuts until you have your shape.


3rd Shape – Circle
The final shape we’ll be cutting out is a circle, which will have you making multiple convex arcs.

Begin by cutting at the edge nearest you and continue in one fluid motion until you reach the edge.

After breaking the excess glass along the score line, rotate the piece clockwise and repeat the process.
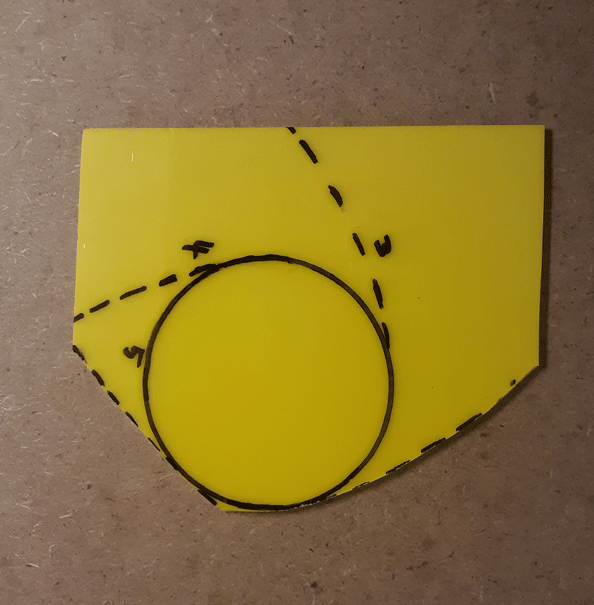
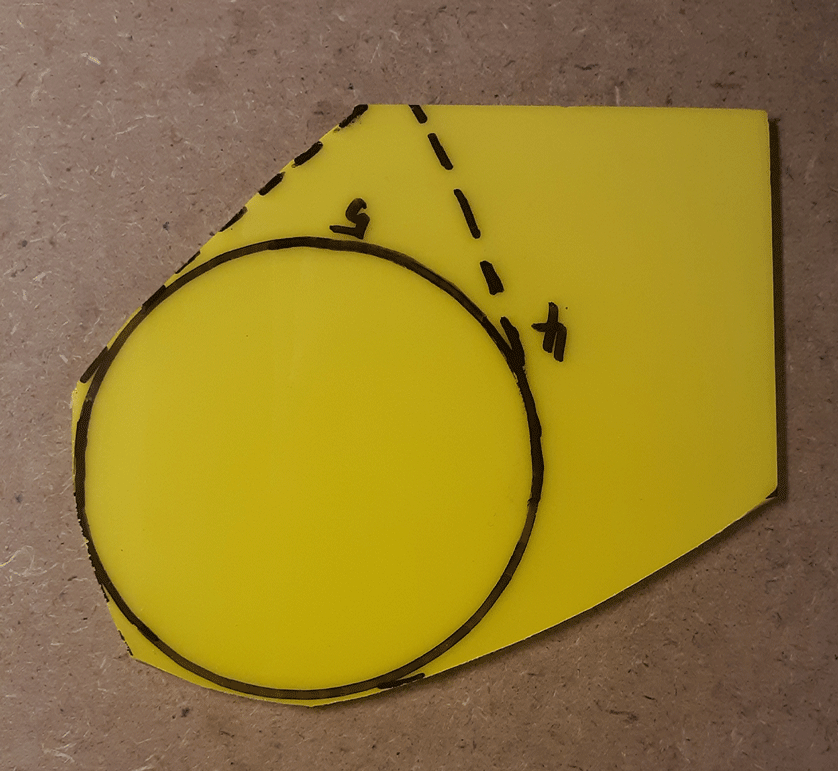
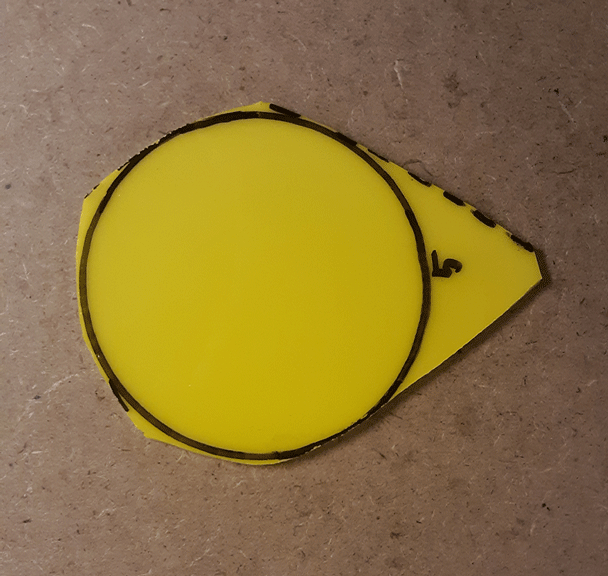
Finally, make a score mart along the circle connected to the excess glass and snap it off.
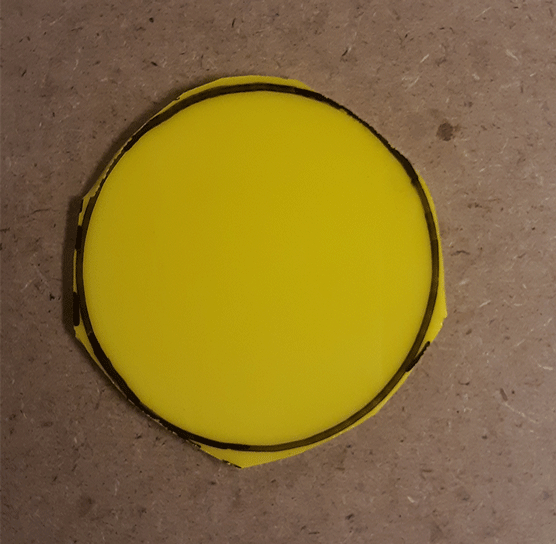
It’s ok if your shapes aren’t perfectly cut out because in the next blog post I’ll be discussing how to correct this using a glass grinder.
Filed under Uncategorized | Comment (0)Glass Cutting: Breaking the Glass
After you make your cut, you need to break the glass apart. Start by gripping the glass so that your thumbs rest on either side of the score mark. Your two index fingers should securely grip the underside of the glass on either side as well.
While holding the piece firmly, rotate both hands out and away from each other in a quick, snapping motion with your wrists. If you scored the glass correctly, it should break cleanly along your line.

NEVER try to break the glass using an inward motion! This puts pressure on the strong, unscored underside of the glass first and could instantly shatter the glass in your hands!
Sometimes you’ll need to make a score that’ll be difficult to break with your hands. A great tool for breaking lines like these is a pare of running pliers. The tool gets its name from the way it causes the glass to crack or “run” cleanly along a score line. The bottom jaw of the pliers has a raised lip in the center that acts as a pressure point on the glass.

To use your running pliers, place them along the edge of the glass with the lip under the score line. Then simply squeeze the pliers together, forcing the glass to gently separate along the score.

When making stained glass artwork, it’s important not to let the little things frustrate you. There’ll always be those times when your glass doesn’t end up snapping the way you want it to. Heck, I’ve been working with stained glass for 5 years now and I don’t think there has ever been a project where the glass behaved exactly the way I wanted it to. You just have to learn from what went wrong and try again.
Filed under Uncategorized | Comment (0)Glass Cutting: Making the Cut
Now that you know how to properly use your cutter, it’s time to learn about cutting and breaking your glass. Before we get started, let me clarify something. The term “Glass cutting” is a little misleading because you aren’t really cutting the glass itself. What you’re actually doing is scratching a line onto the surface of the glass, which is referred to as scoring. What this line does is create a weak point where the glass can be snapped apart cleanly.
For anyone wanting to practice at home, I recommend using some scrap pieces of smooth cathedral glass. If you don’t have any scrap glass, then find a fairly inexpensive sheet of smooth glass to use instead.
Make sure you’re cutting weal is lubricated before and after every cut. An easy way to do this is by taking a small scrap of cloth and soaking it in a cap full of wheel cutting oil. Then tap the wheel against the cloth to lubricate it. Also, make sure you’re wearing safety goggles when cutting glass!
To start your cut, put the wheel down on the side of the glass nearest you, as close to the front edge as possible. For this practice cut, make sure there will be at least an inch of glass on either side of the score when you are done to make breaking easier.

Apply enough of a firm downward pressure so that the wheel is able to make contact with the glass without slipping. Pressing down too hard may cause the glass to crack; if your line ends up looking white and powdery, you’re probably pushing down too hard. Pressing down too lightly may allow the wheel to slip or produce an incomplete cut.

While applying pressure, slowly push the cutter forward at a steady and even pace so the carbide wheel turns against the glass. A good score sounds like a piece of paper being torn in half. Make sure to stop your cut as close to the edge of the glass as you can without actually touching it (around 1/8 inch away is a good rule of thumb). Cutting all the way to the edge can cause the glass to crack and splinter, which could ruin the piece your scoring.

NEVER try to rescore a line you’ve already cut! This could cause the glass to break unpredictably, and you run the risk of damaging the cutting wheel. If you’re not confident in a cut you make, just make a new one.
Filed under Uncategorized | Comment (0)Glass Cutting: How to hold your Cutter
Before I discuss this weeks topic, I wanted to say that there is a lot of information to cover when it comes to the cutting of stained glass. To make the information easier to digest, I plan on breaking the glass cutting process into three different categories: Holding your cutter, Cutting & Breaking the glass, and Cutting different shapes.
For this week’s post, Ill be going through the basic technique of how to properly hold your wheel cutter. Now this isn’t the one-and-only way to hold you cutter. But until you’re more comfortable cutting glass, I’d recommend starting with this technique, as it’s the best one for beginners.
To hold your wheel cutter, first place it between the pointer and middle finger of your dominant hand as shown in the image below.
Next, close your pointer finger and thumb down on the divots of the cutter. This way your pointer finger will act as a guide to keep the cutter moving straight. The ball of the cutter should rest in the crotch of your fingers, just below the knuckles.
Finally, with your other hand, place your thumb on the top of the cutter and your pointer finger along the shaft holding the cutting wheel. This is done to help provide downward pressure and help guide the cutter.
Before you go practicing on glass, you should really get a feel for how it feels to grip the cutter in this way. I know how awkward it feels at first, but after some time and practice, you’ll get the hang of it.
Filed under Uncategorized | Comment (1)Understanding your Glass
A good craftsman is one who understands the materials of their trade inside and out. The same can be said about working with stained glass. Before you go cutting and breaking apart glass to work with, it helps to know about how it’s formed and the various types that exist.
For the most part, stained glass is typically created when a mix of sand, ash, metal oxide colorings, and other ingredients are heated to incredibly high temperatures to create a molten liquid. The liquid is then either blown or rolled into a thin sheet and left to cool. This process was originally done by hand, but can now be replicated with the help of machinery. One thing to note is that both techniques can result in various changes to the glass, such as its appearance, texture, and price.
Within the stained glass community, there are typically two categories of glass: Cathedral and Opalescents.

Cathedral glass is transparent, meaning light can pass through it easily. Because of this, it’s often used in projects designed to be backlit by the sun. Cathedral glass panes are great for beginners because, not only are they made in a variety of different colors and textures, they’re fairly easy to cut.

Opalesents have a milky, dense quality to them. As a result, light has a harder time transmitting through the glass. Most Opalesents are considered semi-translucent, meaning they allow some lite to pass through it, while some are virtually opaque and allow no light to penetrate at all.
Within these two categories of stained glass are subcategories, such as Antique, Iridescent, and Art glass.
Antique glass gets its name not because of its age, but from the traditional way it’s produced. When the glass is melted into a molten liquid, it’s then blown into thin sheets and allowed to cool. Because this process is more labor-intensive, Antique glass can be a little more expensive to buy.

Iridescent glass is created by adding metallic elements that are then fused with the glass itself. This results in an additional sparkling or shimmering effect.

Art glass is unique in that it can have characteristics of both Cathedral and Opalescent glass. Due to the glass’ higher quality, it’s typically more expensive than other mass-produced glasses.
With all the different choices out there, choosing what glass to buy can seem daunting at first. For anyone new to stained glass, I would recommend buying Cathedral glass to start out. Not only is it generally the cheapest of the two categories, its also easier to cut. After you get more comfortable with cutting glass, then you can move onto other sub-categories.
There’s one last thing to always keep in mind when picking out stained glass: What glass you choose to buy all depends on the kind of project you’re working on. Consider where it will be presented; Is it meant to be hung on a wall or a window? How does the glass look with or without light piercing through? Does the glass complement/work well with other sheets your using?
Let me give you an example of just how much of a difference light can make glass look:

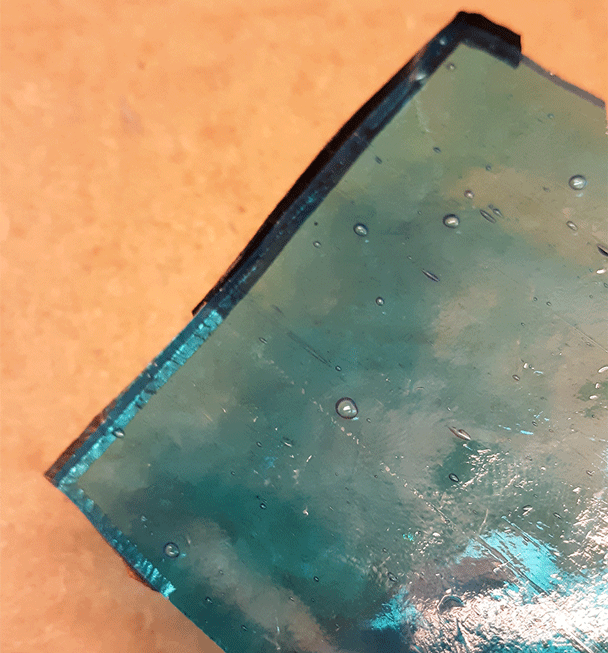
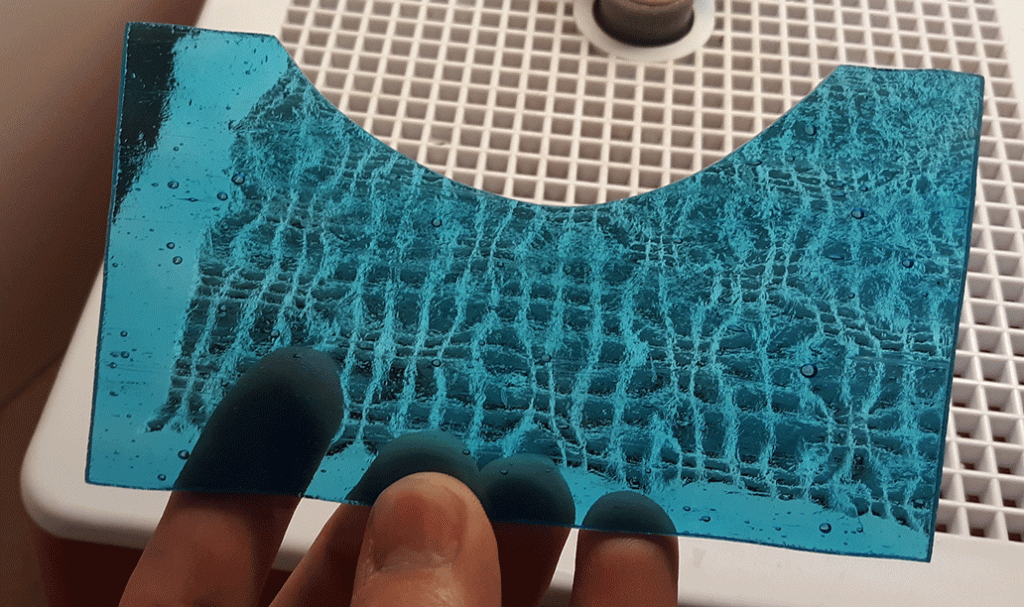
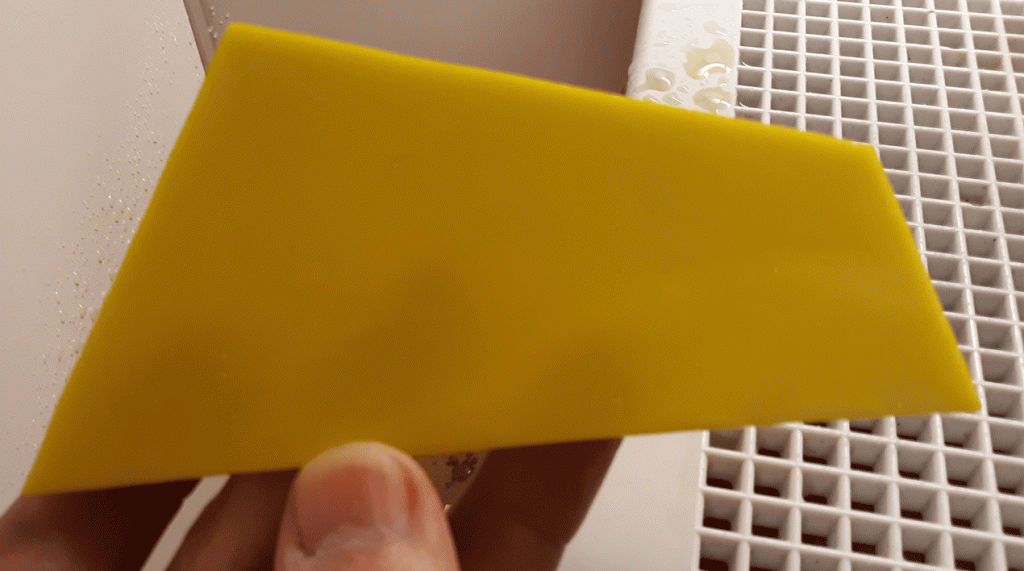
Here we have an Opalescent piece of red glass. As you can see, it has some wispy patterning to it, but for the most part the color is pretty consistent when light is piercing through.

Now here’s that same piece of Opalescent glass without light shining through it. Looks entirely different, right? In this image, you’re able to see the different patterns and colors of the glass that were impossible to make out before.
Keep all this in mind when perusing through stained glass your looking to buy for your next project!
Filed under Uncategorized | Comment (1)