Beginner’s Guide to Manual Photography
In future posts when I show photos I have taken with my DSLR, I will also include the camera settings I used to get the results. If you don’t know much about photography, the terms “shutter speed,” “f-stop,” and “ISO” are probably unfamiliar to you. In this post, I will explain what each of those settings are and what they do for the photos. You won’t need to memorize all of this to understand future posts on this blog, but hopefully these explanations will give you a better understanding of what goes into DSLR photography.
Shutter Speed
Shutter speed is exactly what it sounds like: the speed at which the camera’s shutter opens and closes. Depending on which number the shutter speed is set to, the photo will look brighter or darker. Using a lower (or longer) shutter speed means the camera’s shutter will stay open longer, bringing more light into the sensor and resulting in a brighter photo. Photos taken with a lower shutter speed will also blur motion. On the other hand, using a higher (or faster) shutter speed means the camera’s shutter won’t stay open as long, bringing less light into the sensor and resulting in a darker photo. However, a faster shutter speed will freeze motion, making it an ideal setting to use when photographing sports or other activities done at a faster pace.
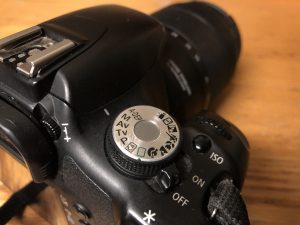
Each number that represents a different shutter speed begins with the number 1 and a /. Typical shutter speed intervals may start with 1/2 or 1/4 and go all the way into the 1000s (my camera’s highest is 1/4000). My camera also has even smaller intervals below 1/2 such as 1”, 10”, 20”, and 30”, but those are usually only used in cases where extreme long exposure is needed (for example, photographing fireworks). 1/125 is what I usually set my camera to on an average day, but I may need to adjust that setting depending on other environmental factors. For example, if I were photographing an outdoor event where the sun is shining brightly, I would adjust my shutter speed to a higher number such as 1/500 to ensure that the photos are not overexposed. However, the other settings of the camera would need to be adjusted as well, which leads me to the next setting: the f-stop.
F-stop
The f-stop, also known as the aperture, is the number that represents how wide or how narrow the opening in the camera’s lens becomes. This setting, like the shutter speed, also controls how much light is let into the camera’s sensor. The lowest f-stop number of many standard camera lenses is f/3.5. From there, the numbers become larger (f/4.5, f/5.6, f/8.0, f/10, f/13, etc.). However, a smaller f-stop number actually makes the camera’s aperture wider, and therefore a larger f-stop number makes the aperture smaller. A wider aperture results in a brighter photo, and a smaller aperture results in a darker photo. This may seem confusing at first, but with practice it becomes second nature.
The aperture also affects what can be seen in the background of a photo- the depth of field. Using a smaller f-stop number and shooting close to an object or person makes the background blurry, creating what is known as a shallow depth of field. For example, photographing a particular flower in a field with f/3.5 as my setting may cause any flowers behind it to appear blurred. If I were to photograph that same flower with f/22, the flowers behind it would be more visible like the first flower I was focusing on. Remember that the other camera settings would be adjusted as well, including the third important setting: ISO.
ISO
ISO is an acronym that stands for “International Organization for Standardization.” Basically, this setting defines how sensitive the camera is to light. The scale for this setting starts at 100 and goes to 200, 400, 800, 1600, and 3200. Some cameras may even go as high as 6400, but mine only goes to 3200. The higher the ISO, the brighter the photo will be, resulting in many people using the highest setting when taking photos in low light. However, higher ISO settings also result in more grain (also known as noise) in the photo. Sometimes noise can be fixed in editing later on, but it is typically not something you want to be present in your photos. If possible, it is recommended to use a lower ISO and adjust the other camera settings to help more light flow into the camera’s sensor.
Review
All three of these settings work together to create a balanced photo. Shutter speed can blur or freeze motion, the f-stop or aperture helps focus on the object of interest, and ISO determines how bright or dark the photo will turn out. Each setting needs to be adjusted to work with one another according to the amount of natural light available. I hope this post was helpful in explaining manual photography- check back for more posts each week!
Leave a Reply