Gel Nail Polish vs Regular Nail Polish
There is always debate about which nail polish is better, gel or regular. There are pros and cons to each. This post will dive into both and explain the benefits and the downsides.
Gel Nail Polish
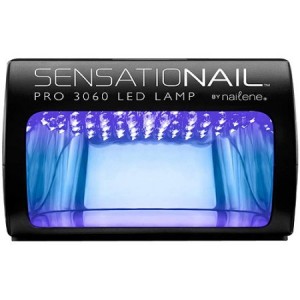
Gel nail polish is preferred by many because it lasts much longer than regular nail polish. Generally you’re lucky to get a week of wear out of regular nail polish whereas gel will stay on up to 3 weeks. Gel nail polish is also much shinier than regular nail polish and the shine doesn’t dull throughout wear. However there are some downsides to gel nail polish. It tends to be more expensive. This is why I buy my gel nail polish on wish, but generally speaking, going to the store to buy gel nail polish, it will cost you about $9 a bottle. Some say that this cost is outweighed by the fact that you only have to paint your nails every few weeks as opposed to every few days. However, in order to get started with gel nail polish at home you are going to need a kit. The basic necessities would be a light, which looks like this:
and you’ll also need a top coat, and rubbing alcohol. That is the very basics, but most people like to also have a primer and a base coat as well as the specifically formulated cleanser and remover. This can get pretty pricey. A kit with all of this would cost you around $4o. The process of doing gel nails is also longer than regular nails. You start by buffing your nails, you then prime them to make sure they are clean for the polish. After that, you apply a base coat and cure it for 30 seconds in the light. Then you take your gel polish and apply as many coats as you see fit, curing for 30 seconds in between each. After you’re satisfied with the color you’re going to want to use your top coat to lock it in and increase the shine. Then you have to cure this for 30 seconds as well. After you’re all done with all of that you have to use a cleanser, I use rubbing alcohol instead because it basically does the same thing but it’s a little cheaper. And then you’re done. Now if this all seems a little much to you, there’s an easier option for you.
Regular Nail Polish
Regular nail polish is sort of self explanatory but let’s discuss the pros and cons. The pros would definitely be cost and the fact that the process is much quicker and easier. However, you are going to have to wait for your nails to dry, this is pretty inconvenient if you have other things you need to do because waiting for them to fully dry takes around half an hour. Also another con is the lack of shine, even with a nice top coat the shine dulls pretty quickly. Finally, the biggest con is wear-time. Generally with regular nail polish my nails are chipping that day or the next, but gel is specifically designed not to chip.
Now that you know the pros and cons it’s up to you to decide what works best for you.
Review: Better Than Sex Mascara
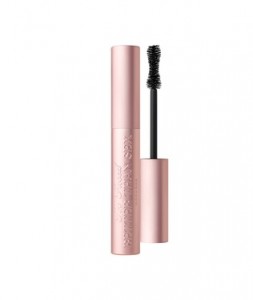
Anyone that wears makeup has heard of the Better Than Sex mascara by Too Faced. It’s rumored to be… well better than sex. But is this $23 mascara really worth your buck?
Sure $23 may seem a little excessive for someone that’s on a budget (like myself) especially considering you can buy drugstore mascara for about $5. But I personally find this mascara to be something to splurge on. Generally I stick with the cheap stuff and what comes in my Ipsy bag, but liquid lipstick and mascara are my personal vices. This mascara is the best of the best. I have tried so many different mascaras in my lifetime and this one really knocked it out of the park.
Sure, the packaging is nothing special. But it works. For $23 your getting 8 ml, which generally lasts me 3 months or so. Of course I use multiple layers. But if you start with a primer, I guarantee you 2 coats of this stuff is going to make your lashes look absolutely stunning.
Now for the benefits, this mascara gives me incredible volume without my lashes being weighed down. With 2-3 coats you don’t have a lot of clumping which definitely doesn’t happen with your drugstore mascara. It also lengthens, prior to this I had only found one other mascara that was able to give me length and volume. That mascara was younique’s fiber lashes and that mascara gave me a a cornea infection. So i’d say that Better Than Sex is the way to go. Finally, this is a long-wear mascara. I’ve slept in this and woke up in the morning to pretty lashes. It will literally last you 24+ hours. Doesn’t get much better than that.
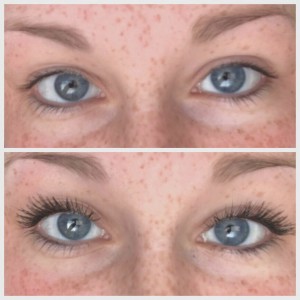
Here’s a before and after: (primer, 2 coats, and no lash curling)
As you can see the difference is night and day, drugstore mascaras just don’t do that. Overall, if mascara is one of your favorite beauty items, I recommend this one. Coming from someone who’s tried almost every mascara under the sun, I can tell you this one’s good and your $23 will be well spent. Purchase Here
Review: Elite 99 Platinum Gel Polish
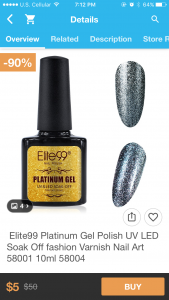
There has been a lot of buzz around a new gel nail product. The Elite 99 Platinum Gel polish is supposed to be “super blinged” aka there’s a ton of glitter in it. Being that I’m a huge fan of Elite 99, gel nail polish, and all things glitter…. I decided to try it out. I purchased mine on Wish for $2, however the price has recently increased to $5 (assuming this is because of the demand for the product) and also you can purchase it on amazon for $5. I know that some people are uncomfortable making purchases with the Wish app. Regardless this is a cheap product. Now you have to have a light and the base and top coats already purchased in order to use the product so it can get pricier in that sense.
Here is the picture on the app:
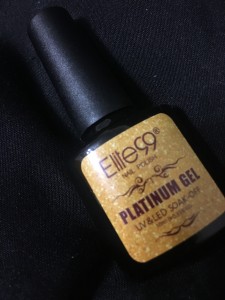
Here is what I received:
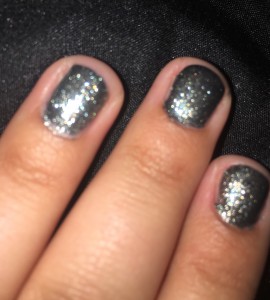
I can’t seem to really get a good photo of the polish because of all the sparkles but here’s what it looks like on: (please excuse my nails, I recently had to cut them all super short due to some breakage)
The polish looks so good in person, and I really wish I could capture it better in a photo but I don’t have a nice camera that will focus on them. The polish is completely packed with glitter as it promised it would be and I really like it.
The only downside I found was that it took a little extra curing, the usual 30 seconds that my lamp cures wasn’t enough to make this gel polish completely solid. But overall, I think this product is worth the $5 if you like gel polish! It comes in so many other colors like pinks and golds and I’d really like to see those in person. Overall, I would recommend and will most likely purchase more.
Matte Vs Gloss
Lip color has been a beauty gurus’ staple since the beginning of cosmetics. Although lip color trends go in and out, there is definitely a debate over which is the preferred look: Matte or Gloss.
This blog post will dive into the two types of lip color and the positives and negatives of both. (If you still can’t decide which side you’re on, I have good news. There’s a middle, you can wear a lip lacquer which is basically a happy medium.)
NOW: TEAM MATTE or TEAM GLOSS
Matte:
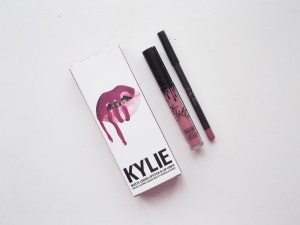
Matte lipstick essentially has no shine to it at all. It’s very pigmented. It really conveys bold colors in a way gloss can’t. Matte lipstick will last you for hours. You can eat or drink with a good liquid matte lipstick (Kylie Jenner Lip Kit) on. One downside however is that matte color can be very drying. Also, matte color can be a little harder to apply, you need a steady hand or a lip liner to ensure that the color is only going on your lips. It can be easy to overdo the lining and end up with a matte mustache. So it will take some practice if this is your look of choice.
Gloss:
Gloss is a shiny, sometimes even shimmery finish. This is more of a light color. Most glosses aren’t very pigmented. Gloss is much more comfy for your lips, it keeps them moisturized. Gloss also tends to have a plumping, and therefore more youthful look. However, the wear time is much shorter and can leave your lips with a sticky feeling. Another con to the gloss is that you can’t really eat or drink without getting the gloss all over. If this is your look, be sure you bring it with you as you’ll be wanted to reapply throughout the day or event.
Now that you’ve heard both sides, which one are you going to reach for? Matte or Gloss?
February Ipsy Bag
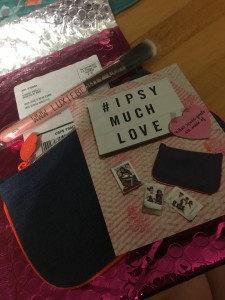
This is my monthly Ipsy bag review! For those who don’t know what ipsy is, it’s a service that sends you 5 different makeup items (usually sample sizes) every month for only $10. You don’t get to pick your products, however, you do fill out a quiz and rate products in order for ipsy to better match your products to you as an individual.
FIRST: the bag
It comes in shiny purple/pink packaging which I love, then you open it up and there’s this cute little card every month talking about the bag. This month’s bag was “much love” for Valentine’s day. The bag was denim with a orange zipper. I don’t like the bag this month and due to Ipsy sending me a new one every month I have so many bags that I don’t even know what to do with them so I threw this one away.
PRODUCTS:
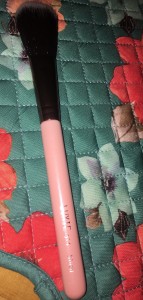
This is the Luxie Beauty- Rose Gold Blush Brush 514 Purchase Here
This brush is incredibly soft. It is a nice brush for highlighting or adding a light blush. However, if you’re looking for something to give a lot of coverage this wouldn’t be the brush. Overall it’s a high quality brush and the fact that it’s pink just makes it better in my opinion.
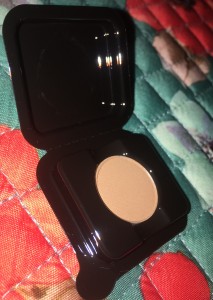
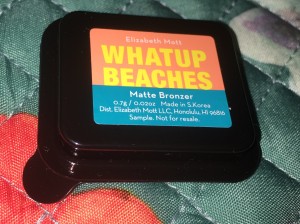
This is the “Whatup Beaches” matte bronzer. Purchase Here
Not to be dramatic but this bronzer gives me life. I wish the sample wasn’t so awkward and tiny but I’ve been trying to find a truly matte bronzer that works with paler skin for a while now and I’ve officially found it.
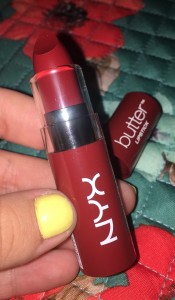
This is the Nyx Butter Lipstick in the shade Ripe Berry Purchase Here
I’m just gonna come out and say this. I’m a matte lip/ liquid lipstick type of girl. This lipstick is a little satiny-borderline chapstick for my likings. The color is really pretty and it doesn’t dry your lips the way a lot of lipsticks do. It’s definitely a personal preference thing so if your into a wetter finish, check this out.
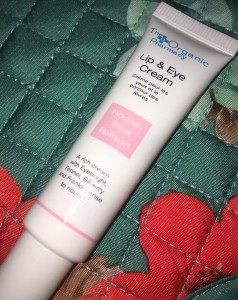
This is a lip and eye cream by the Organic Pharmacy Purchase Here (fair warning, it’s $48 for 10 ml…)
This stuff is crazy, I mean like crazy amazing. I put it on 2 days ago and the skin under my eyes is still firmer, more moisturized and less puffy. I tried it on my lips and didn’t really notice anything but I don’t have any fine lines or problem areas around my mouth. Overall this is a really nice product and this alone was worth my $10 this month, however I don’t think I’d be willing to fork over the $48 for another tube.
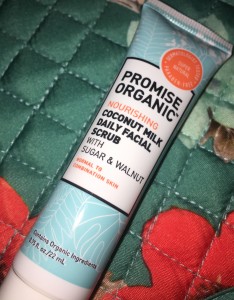
This is a nourishing coconut milk daily facial scrub, Ipsy’s link to the product is not working but it looks as though it’s a regular drug store product.
This is nothing fancy by any means, just your typical exfoliant scrub.
And that concludes my Ipsy Glam Bag this month, overall I was super impressed and as usual I felt like I got way more than my $10 worth of products.
If you’re interested in an Ipsy bag yourself you can sign up HERE (there’s no commitment just $10 a month and you can stop at any time)
Best Nail Polish for Your Buck
Some feel that all nail polish is created equally, personally I do not feel that way. When it comes to your standard nail polish there are hundreds of brands to choose from at a variety of prices. This post will go through some of the most popular brands and tell you about them, benefits and disadvantages along with the price range they are in. Then you can decide if it’s worth your money or not.
First, the ever popular, Sally Hansen- Sally makes a variety of nail polishes, they have “Xtreme wear” “quick dry” “miracle gel” and their regular gel polish (which requires a UV light) therefore I won’t be reviewing it in this post.
The Xtreme wear is their most basic nail color. It sells for about $2-$3. which is soooo cheap. however, as with most things, you really do get what you pay for. The color is saturated, which is a definite plus, but it chips off within hours. This is not a longwear polish.
Quick Dry-Coming in at about $4 this nail polish is still cheap and a slight upgrade from the xtreme wear. It goes on saturated, but doesn’t stay for long. The upside is that this nail polish dries much quicker than the normal nail polish.
Miracle Gel- This nail polish requires both the polish and the special gel topcoat to work. The set of color and topcoat is about $15. This is a definite upgrade from the regular nail polish. It stays a couple days and doesn’t chip near as easily. Although it’s $15 your mani will last days longer.
Essie-Essie is amazing in my opinion. At about $6-$9 it’s a bit more expensive. The downside of this polish is that you often need multiple coats to get a saturated color. However, it stays much longer than other polishes. Sometimes my nails won’t chip for a week, which is essentially unheard of using your typical nail lacquer.
OPI-OPI is often found in nail salons, so it’s obviously a higher quality nail polish. At about $8-$10 it can be a little more expensive but the range of colors is unheard of. Anything you want OPI most likely has it. OPI nail color tends to last a couple (2-3) days before chipping.
F.U.N Lacquer- This is not as popular of a brand as the others and generally you have to order these polishes online. However, the colors are beautiful in this collection. Ringing in at $12-$13 it’s a little pricey. But these colors are gorgeous and last for days. The glitters are just unlike any other brand I’ve seen. My personal favorite is the Black Holo Witch which comes highly endorsed by my favorite nail youtuber, simplynailogical.
So now that you know a little about some popular nail polishes, I hope you feel more prepared to make an informed decision about your next nail color.
Ombre vs Balayage
People are always confusing the terms balayage and ombre. In all actuality they do look similar. However there are some key differences to the two hair styles.
Ombre and balayage are among the newer trends in hair color. It’s common for ombre or balayage to include dark roots and blonde ends, however there are endless possibilities when it comes to color.
Ombre– the ombre look is when there is one color for the roots and another color on the bottom of the hair. Usually the ombre line is towards the middle or bottom of the hair.
Sombre– sombre is a term for a softer version of ombre. This often uses colors that are closer on the spectrum. Sombre is supposed to look less harsh and more natural. (although this is not a natural look)
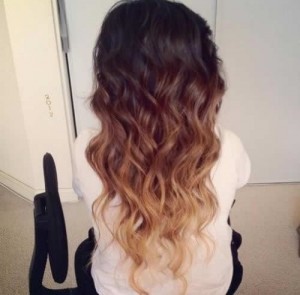
By far my favorite look is the balayage. Balayage uses more highlights and lowlights. Typically the term balayage refers to hand painting in the highlights and lowlights to frame the face among other things. However, this look can be used by foiling as ombre and sombre are done.
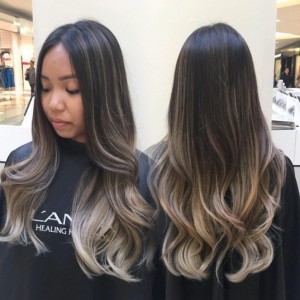
- This is an example of balayage, you can see how there are more distinct highlights and lowlights but overall the roots are still darker than the ends.
Cost- This definitely depends where you go. However ombre is by far the cheapest because it generally is less work for the hair dresser. When I had my hair ombre’d it cost me $125, a sombre takes slightly more work and my hair dresser charged me $170 for a sombre. Now, if you’re interested in a nice balayage prepare to pay for it. I had a really nice balayage done that ended up costing me $200. Also you need to consider tipping, an ombre usually takes like 1-2 hours. My balayage took 4.5 hours. Being that my hair dresser did a ton of extra work and it looked awesome I tipped her $35.
Overall, you need to weigh your options, keeping in mind cost and the difference in the look, everyone should do their research and choose what’s right for them!
Review: Silisponge
If you like makeup, you’ve probably heard of the new makeup blending tool by Molly Cosmetics, the Silisponge. (Can be purchased here: Molly Cosmetics-Silisponge) It blew up on social media around Christmas time. Everyone from Teen Vogue to the Today show covered this “revolutionary tool.” Jeffree Star, a popular beauty blogger, even did a review which you can watch here: Silisponge Review and Demo. I purchased this item on the 5th restock and have had it since around the 1st of the year. While I was waiting for my Silisponge to arrive I did all kinds of research about it. I found countless bloggers and vloggers saying the application was fabulous and that they’d never use a beauty blender again. I obviously had very high hopes after reading all this buzz. **SPOILER ALERT** I don’t like it.
Review:
The Silisponge claims to be far superior to the beauty blender, however this is not what I found from using it. The one positive thing I can say is that the product does not suck up foundation like the typical beauty sponge, and is way easier to clean.
However… The application is horrible. With a traditional beauty blender, foundation goes on smooth and is blended out simply by tapping the sponge around. It’s so easy and looks great. With the Silisponge it takes a lot of rubbing and tapping and even blending with your fingers to get a streak-free application.
The Silisponge retails under $10 and a decent beauty blender costs about $12. Not to mention the product you save by using the Silisponge. The Silisponge doesn’t need to be replaced whereas the Beauty Blender should be replaced every few months. Clearly there are benefits to the Silisponge, it is more sanitary and economical. Does that mean it’s a better product? Not in my opinion.
Comparison:
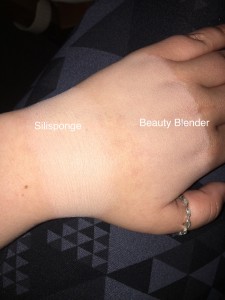
As you can see the Silisponge application is very streaky. I did the same amount of blending with both to make sure it was an equal comparison.
All in all I do not recommend this product, there are obvious benefits to the Silisponge, but I personally would rather spend the extra money on the beauty blending sponge (considering it’s not an expensive product in the first place) for a better application. What do you think? Let me know in the comments!
