In your dorm or room and feeling bored with your decorations? I AM TOO! For today’s log, we pulled some DIY dorm inspiration to upscale your space for a low cost and easy to do. Check out this inspo. and how to make it happen!
DIY Flower Lights

Necessities:
- 1” Ribbon (from the dollar store)
- The lights will shine brighter if the ribbon is someone see-through or iridescent.
- String lights
- Tape
Step 1: Cut about 2 inches of ribbon and wrap it around each light. Make the ribbon tight in some parts, and looser in others to get that flower effect.
Step 2: There isn’t one, THAT’S IT! 🙂
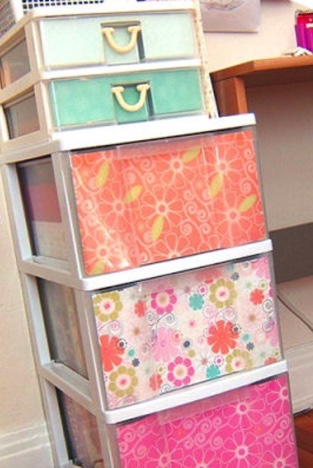
Plastic Drawer Revamp
Necessities:
- Construction paper or scrapbook paper
- Scissors
- Tape
Step 1: Take your construction paper or scrapbook paper and cut it out the size of your plastic drawer.
Step 2: Once you have your sheets cut out, tape them on the inside of your drawer, and you will see the cute design or colors shining through!
Flower Power Mirror or Frame

Necessities:
- Mirror or Frame
- Hot Glue
- Flowers/Leaves (can be found at the dollar store as well)
Step 1: Cut or remove the flowers from their stems.
Step 2: Hot glue the leaves and flowers to the mirror/frame, layer them, and vwaaaa-laaa, you will have a beautiful flower power accessory!
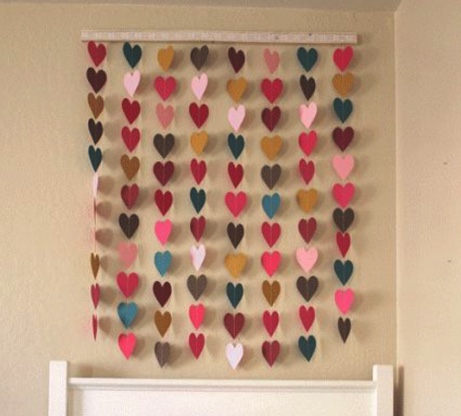
Shape (of your choice) Wall Hanging
Necessities:
- Construction paper or scrapbook paper
- Scissors
- Tape
- String
Step 1: Cut out 30-50 shapes of your choice. (based on 10 shapes per strand) You can make hearts, circles, flowers, squares, or whatever else you would like to feature in your room!
Step 2: Take a piece of string, and tape your shapes to the piece of string. Based on your room and the area in which you would like to put this wall hanging, that is how long you should cut your string. If you are hanging this craft behind your bed, you can make these 3-4 feet long. If it is for a short section above your desk, only make your string 2 feet long and use less shapes. The outcome of the look you are going for is up to you!
Custom Corkboard

Necessities:
- Corkboard
- Painters Tape (depending on the look)
- Paint
- Paint Brush
Step 1: Take tape, and outline the shapes that you would like to fill in with paint. If you do not want to do an outline, you can paint polka dots or the first letter of your first name on the board!
Step 2: Let your paint and designs dry, and then hang it up!
There are so many easy, quick, and inexpensive ways to customize your room and give it a little more personality! We hope that you enjoyed this blog and we cannot wait to see you again for the next one!
Your Craft Corner Guru,

Leave a Reply